Remote streaming (command line client)
When using the remote streaming option, the data is streamed to a remote computer over the network. This option is useful for applications where the necessary data processing exceeds the capabilities of the Red Pitaya board and must therefore be done with more powerful tools on a remote computer. Streaming through the command line client is the most effective way to transfer the data, allowing for the highest possible data transfer rate.
The command line client is available for Windows and Linux operating systems and supports Multiboard streaming.
Tip
For maximum streaming performance, disable the Red Pitaya web interface before streaming. This frees up system resources and network bandwidth. See Performance Optimization Guide for details.
Download the “command line streaming client” for your computer. Clients are located on the board itself and can be downloaded from there.

Start the Streaming application from the web interface or from the Command line.
Configure the stream properties & click Start
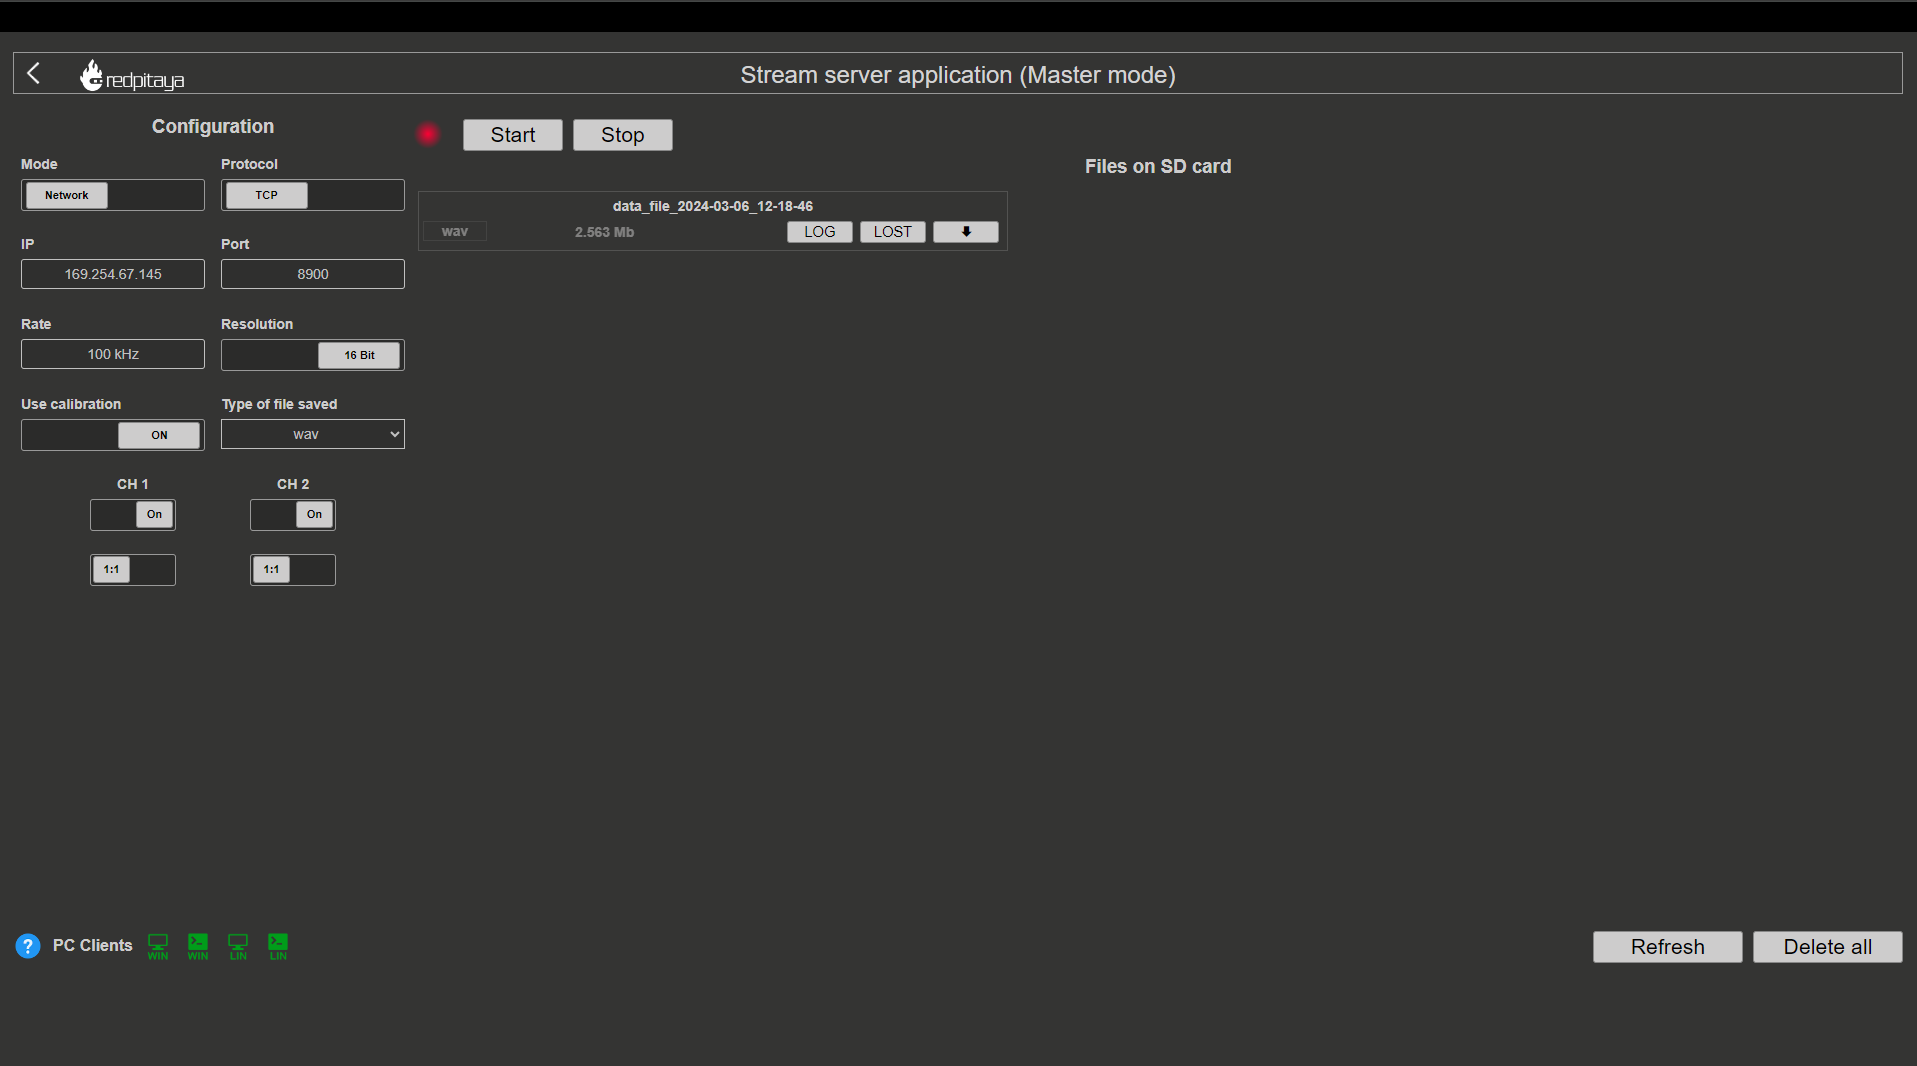
Figure 3.2 Example: streaming on CH1 and CH2, 16-bit resolution, 100 ksps, TCP
Run the streaming client via
Command LineorTerminalon a remote computer (copy the IP address from the web interface and choose the required file format).rpsa_client.exe -h 192.168.1.29 -p TCP -f ./ -t wav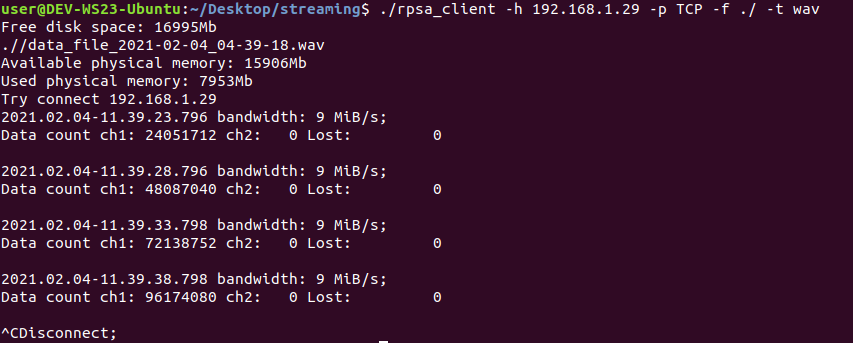
Data streaming can be stopped by pressing
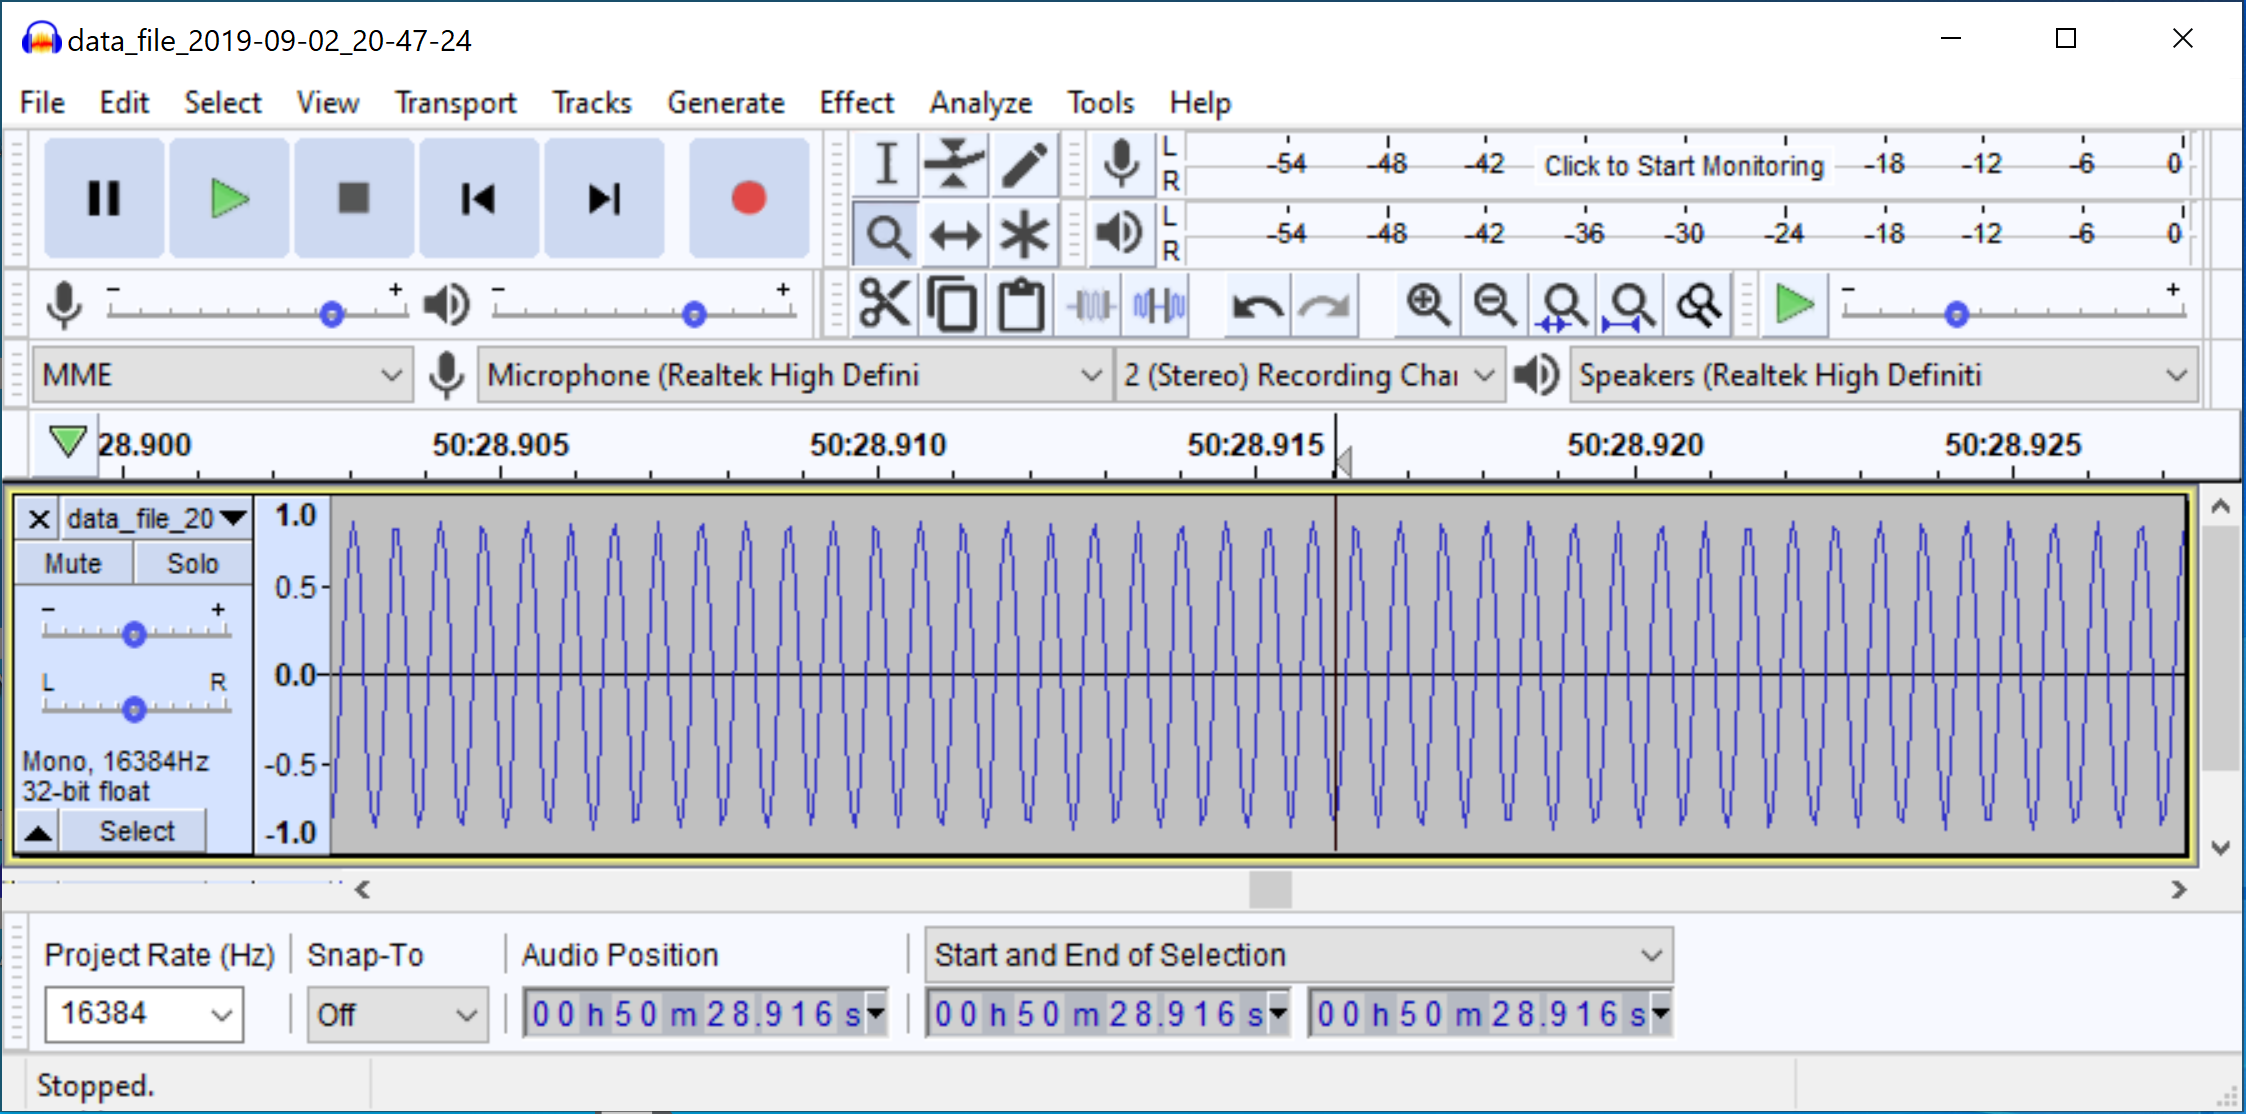
Ctrl+C.The created wav file can be read or viewed in Audacity or another program that supports WAV file type:
rpsa_client.exe -h 192.168.1.29 -p TCP -f ./ -t tdms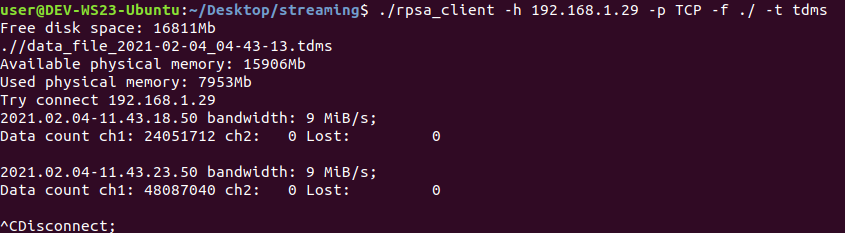
Data streaming can be stopped by pressing
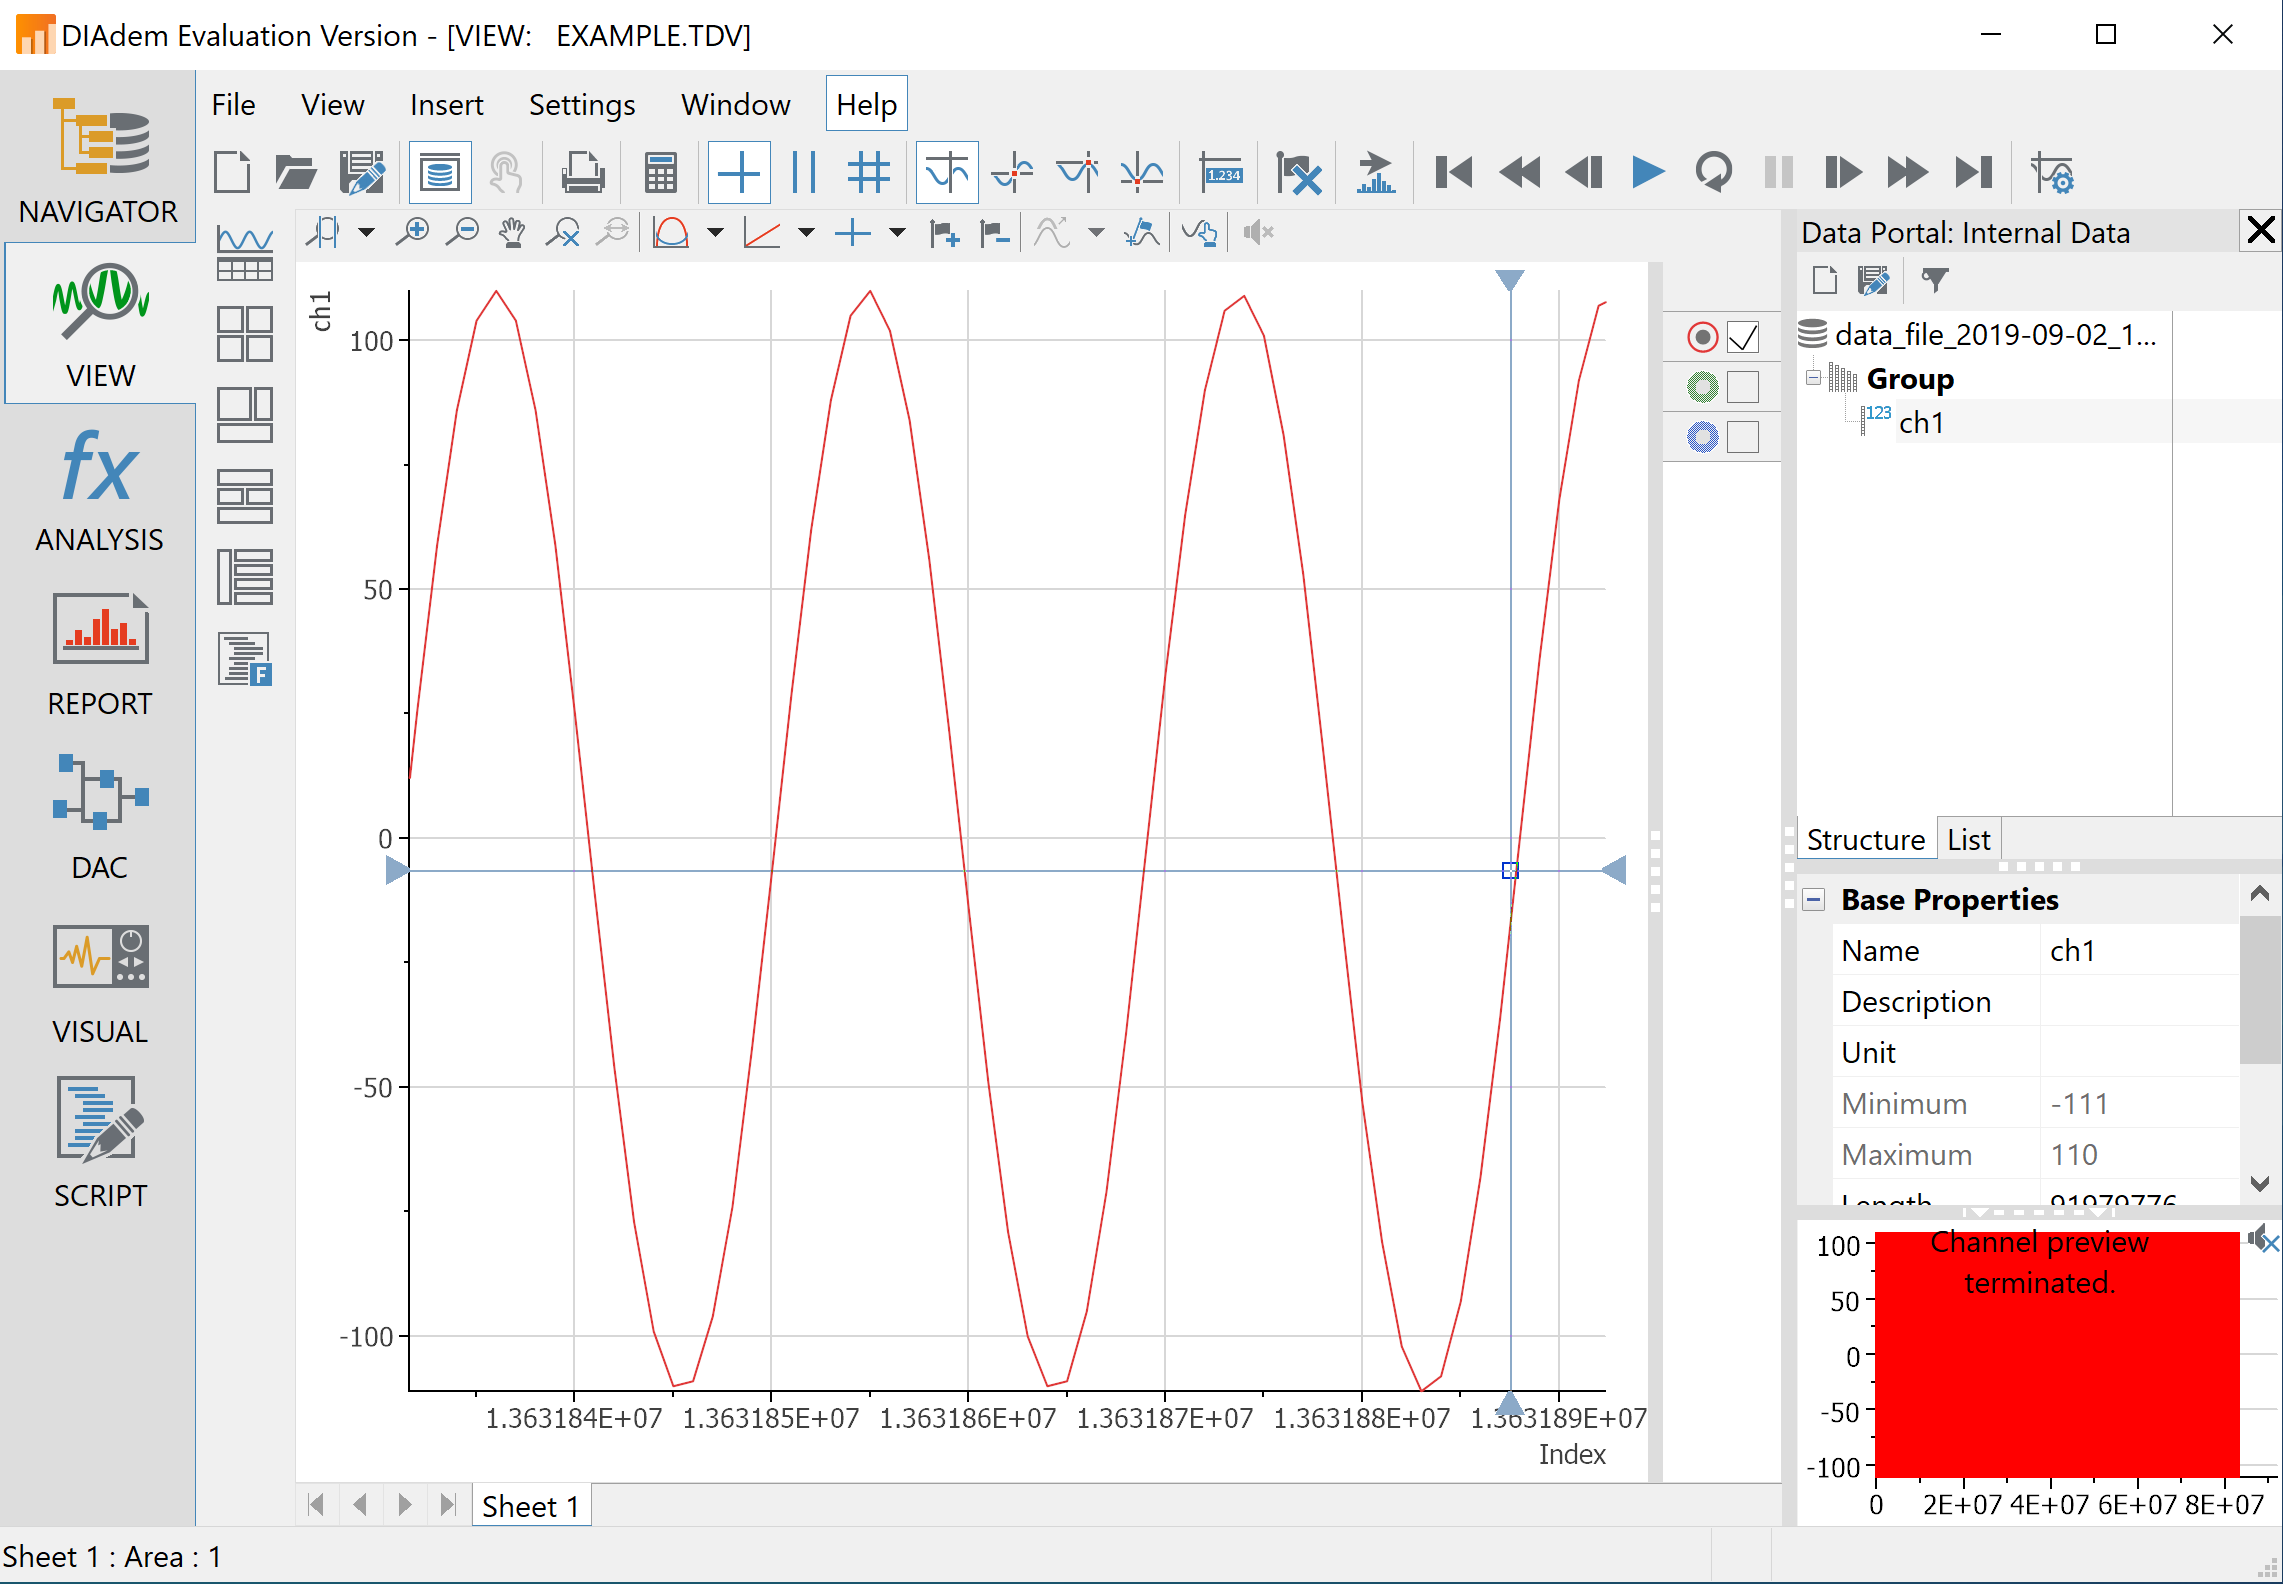
Ctrl+C.The created tdms file can be read or viewed in DIAdem or another program that supports TDMS file type.
rpsa_client.exe -h 192.168.1.29 -p TCP -f ./ -t csv -s 100000 -v
The application saves data from the board in binary (BIN) format.

The binary file can be converted using the convert_tool application.
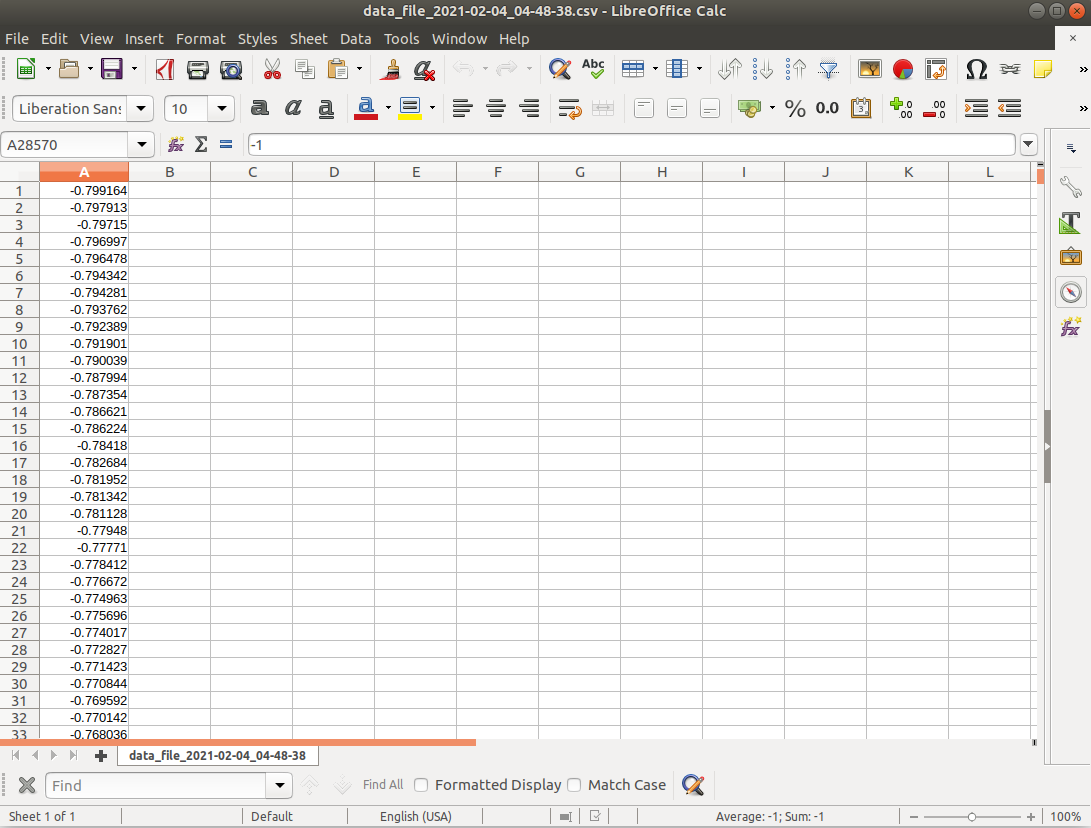
The created CSV file can be opened with any text editor, spreadsheet editor, or any other application that supports the CSV file type:
Note
Using the convert_tool application you can also see the structure of the received file and the state of the file.

Download the streaming client for your computer. Clients are located on the board itself and can be downloaded from there.

Start the Streaming application from the web interface or from the Command line.
Configure the stream properties & click RUN

Example: streaming on IN1, 16-bit resolution 5 MS/s, TCP
Run the streaming client via
Command LineorTerminalon a remote computer (copy the IP address from the web interface and choose the required file format).rpsa_client.exe -h 192.168.1.29 -p TCP -f ./ -t wav
Data streaming can be stopped by pressing
Ctrl+C.The created wav file can be read or viewed in Audacity or another program that supports WAV file type:
rpsa_client.exe -h 192.168.1.29 -p TCP -f ./ -t tdms
Data streaming can be stopped by pressing
Ctrl+C.The created tdms file can be read or viewed in DIAdem or another program that supports TDMS file type.
rpsa_client.exe -h 192.168.1.29 -p TCP -f ./ -t csv -s 100000 -v
The application saves data from the board in binary (BIN) format.
The binary file can be converted using the convert_tool application.
The created CSV file can be opened with any text editor, spreadsheet editor, or any other application that supports the CSV file type:
Note
Using the convert_tool you can also see the structure of the received file and the state of the file.
Note
For best performance, the web interface should be closed and the streaming application should be started from the terminal via the Streaming utility.
Warning
Firewall/Antivirus Configuration Required
The rpsa_client requires network access to detect and communicate with Red Pitaya boards. If you experience board detection or connection issues, ensure the client application is allowed network access
in your firewall and antivirus software.
Common symptoms of firewall/antivirus blocking:
No boards detected in detect mode:
PS C:\RedPitaya\Streaming> .\rpsa_client.exe -d
Search: DONE
Found boards:
Host not found error when trying to connect to a board:
2026.01.30-14.25.08.342:  Host not found
The client did not connect
Solution: Whitelist the rpsa_client executable and allow it to access your local network in your firewall/antivirus settings. The easiest way to resolve this is to run the
program a few times, then check the firewall/antivirus logs to see if it blocked the application, and create an exception for it (look for Network access troubleshooting, Resolve
blocked communication, etc. in your security software documentation).
Instructions for the rpsa_client
Detect mode
This mode allows you to determine the IP addresses that are in the local network in streaming mode. By default, the search takes about 5 seconds.
rpsa_client.exe -d [-t SEC]
rpsa_client.exe --detect [--timeout=SEC]

--detect               -d              Enable broadcast search.
--timeout=SEC          -t SEC          Timeout(Default: 5 sec).
If no IP is specified, the client will automatically detect boards on the network and connect to a random board.
Configuration mode
This mode allows you to get or set the streaming configuration on the boards.
rpsa_client.exe -c [-h IPs] -g V|VV|F [-v]
rpsa_client.exe -c [-h IPs] -s M|F [-f FILE] [-v]
rpsa_client.exe --config [--hosts=IPs] --get=V|VV|F [--verbose]
rpsa_client.exe --config [--hosts=IPs] --set=M|F [--config_file=FILE] [--verbose]

--config               -c              Enable config mode.
--hosts=IP,...         -h IP,...       You can specify one or more board IP addresses through a separator - ','
                                       You can not specify the board address, then the client will take the first board found via broadcast
                                       Example: --hosts=127.0.0.1 or --hosts=127.0.0.1,127.0.0.2
                                                 -h 127.0.0.1     or  -h 127.0.0.1,127.0.0.2,127.0.0.3
--get=V|V1|VV|F        -g V|V1|VV|F    Requests configurations from all boards.
                                       Keys: V  = Displays on the screen in json format.
                                             V1 = Displays on the screen in json format (only data).
                                             VV = Displays on the screen in a format with decoding values.
                                             F  = Saves to a config files.
--set=M|F              -s M|F          Sets configurations for all boards.
                                       Keys: M  = Sets values only to memory without saving to file.
                                             F  = Sets configuration and saves to file on remote boards.
--config_file=FILE     -f FILE         Configuration file for setting values on boards (Default: config.json).
--verbose              -v              Displays service information.
Variables can also be set individually:
rpsa_client.exe -c [-h IPs] -i NAME [-v]
rpsa_client.exe -c [-h IPs] -i NAME=VALUE [-w] [-v]

--config               -c              Enable config mode.
--hosts=IP,...         -h IP,...       You can specify one or more board IP addresses through a separator - ','
                                       You can not specify the board address, then the client will take the first board found via broadcast
                                       Example: --hosts=127.0.0.1 or --hosts=127.0.0.1,127.0.0.2
                                              -h 127.0.0.1     or  -h 127.0.0.1,127.0.0.2,127.0.0.3
                       -i NAME         Returns the value of a variable from the server.
                                       Keys: NAME = The name of the variable that is specified in the Json configuration file.
                       -i NAME VALUE   Sets a value to a variable on the server.
                                       Keys: NAME = The name of the variable that is specified in the Json configuration file.
                                             VALUE = The value is valid for this variable.
--write                -w              Writes changes to the configuration file on the server.
--verbose              -v              Displays service information.
Remote control mode
This mode allows you to control streaming as a client.
rpsa_client.exe -s [-h IPs] -f tdms|wav|csv|bin [-d NAME] [-m raw|volt] [-l SAMPLES] [-t MSEC] [-v]
rpsa_client.exe --streaming [--hosts=IPs] --format=tdms|wav|csv|bin [--dir=NAME] [--limit=SAMPLES] [--mode=raw|volt] [--timeout=MSEC] [--verbose]

--streaming            -s              Enable streaming mode.
--hosts=IP,...         -h IP,...       You can specify one or more board IP addresses through a separator - ','
                                       You can not specify the board address, then the client will take the first board found via broadcast
                                       Example: --hosts=127.0.0.1 or --hosts=127.0.0.1,127.0.0.2
                                                 -h 127.0.0.1     or  -h 127.0.0.1,127.0.0.2,127.0.0.3
--format=FORMAT        -f FORMAT       The format in which the data will be saved.
                                       Keys: tdsm = NI TDMS File Format.
                                             wav = Waveform Audio File Format.
                                             csv = Text file that uses a comma to separate values.
                                             bin = Binary format.
--dir=NAME             -d NAME         Path to the directory where to save files.
--limit=SAMPLES        -l SAMPLES      Sample limit [1-2147483647] (no limit by default).
--mode=MODE            -m MODE         Convert values in volts (store as ADC raw data by default).
                                       Keys: raw = 8/16 Bit binary raw format.
                                              volt = Converts binary integer format to floating point format.
                                                    Measured in volts. In wav format, it is limited from -1 to 1.
--timeout=MSEC         -t MSEC         Stops recording after a specified amount of time.
--verbose              -v              Displays service information.
Streaming mode
This mode allows you to control streaming as a client, and also captures data in network streaming mode.
rpsa_client.exe -s -h IPs [-p PORT] [-c PORT] -f tdms|wav|csv|bin [-d NAME] [-m raw|volt] [-l SAMPLES] [-t MSEC] [-v] [-b TD|F]
rpsa_client.exe --streaming --hosts=IPs [--port=PORT] [--config_port=PORT] --format=tdms|wav|csv|bin [--dir=NAME] [--limit=SAMPLES] [--mode=raw|volt] [--timeout=MSEC] [--verbose] [--benchmark=TD|F]

--streaming            -s           Enable streaming mode.
--hosts=IP,...         -h IP,...    You can specify one or more board IP addresses through a separator - ','
                                    Example: --hosts=127.0.0.1 or --hosts=127.0.0.1,127.0.0.2
                                              -h 127.0.0.1     or  -h 127.0.0.1,127.0.0.2,127.0.0.3
--port=PORT            -p PORT      Port for streaming server (Default: 8900).
--config_port=PORT     -c PORT      Port for configuration server (Default: 8901).
--format=FORMAT        -f FORMAT    The format in which the data will be saved.
                                    Keys: tdsm = NI TDMS File Format.
                                          wav = Waveform Audio File Format.
                                          csv = Text file that uses a comma to separate values.
                                          bin = Binary format.
--dir=NAME             -d NAME      Path to the directory where to save files.
--limit=SAMPLES        -l SAMPLES   Sample limit [1-2147483647] (no limit by default).
--mode=MODE            -m MODE      Convert values in volts (store as ADC raw data by default).
                                    Keys: raw = 8/16 Bit binary raw format.
                                          volt = Converts binary integer format to floating point format.
                                                 Measured in volts. In wav format, it is limited from -1 to 1.
--timeout=MSEC         -t MSEC      Stops recording after a specified amount of time.
--verbose              -v           Displays service information.
--benchmark=MODE       -b MODE      Starts the throughput test mode at the current settings.
                                    Keys: TD = Adds validation of data. Works only in network test mode.
                                          F  = Full system performance testing.
DAC streaming mode
This mode allows you to generate output data using a signal from a file.
rpsa_client.exe -o [-h IPs] -f tdms|wav -d FILE_NAME [-r inf|COUNT] [-v] [-b]
rpsa_client.exe --out_streaming [--hosts=IPs] --format=tdms|wav --data=FILE_NAME [--repeat=inf|COUNT] [--verbose]

--out_streaming        -o              Enable dac streaming mode.
--hosts=IP,...         -h IP,...       You can specify one or more board IP addresses through a separator - ','
                                       You can not specify the board address, then the client will take the first board found via broadcast
                                       Example: --hosts=127.0.0.1 or --hosts=127.0.0.1,127.0.0.2
                                                 -h 127.0.0.1     or  -h 127.0.0.1,127.0.0.2,127.0.0.3
--format=FORMAT        -f FORMAT       The format in which the data will be used.
                                       Keys: tdsm = NI TDMS File Format.
                                             wav = Waveform Audio File Format.
--data=FILE_NAME       -d FILE_NAME    Path to the file for streaming.
                                       Important! Data must be a multiple of 128 bytes, otherwise there will be artifacts on the signal.
--repeat=inf|COUNT     -r inf|COUNT    The number of times the file has been resent.
                                       Keys: inf is an infinite number of times.
                                          COUNT - value from [1 ... 1000000]
--verbose              -v              Displays service information.
Configuration variables
Configuration file variables and their valid values.
Name                      Parameters
format_sd               : WAV,TDMS,BIN
data_type_sd            : RAW,VOLT
samples_limit_sd        : An unsigned integer value. 0 - Disables write limit.
adc_pass_mode           : NET,FILE
resolution              : BIT_8,BIT_16
adc_decimation          : An unsigned integer value: 1-65535.
use_calib               : OFF,ON
channel_state_1         : OFF,ON
channel_attenuator_1    : A_1_1,A_1_20
channel_ac_dc_1         : AC,DC
channel_state_2         : OFF,ON
channel_attenuator_2    : A_1_1,A_1_20
channel_ac_dc_2         : AC,DC
channel_state_3         : OFF,ON
channel_attenuator_3    : A_1_1,A_1_20
channel_ac_dc_3         : AC,DC
channel_state_4         : OFF,ON
channel_attenuator_4    : A_1_1,A_1_20
channel_ac_dc_4         : AC,DC
dac_rate                : An unsigned integer value. Indicates the rate for signal generation. The maximum value should not be greater than the base frequency of the FPGA.
file_sd                 : Path to the file on the memory card in RP that will be used to generate the signal.
file_type_sd            : WAV,TDMS,BIN
dac_pass_mode           : DAC_NET,DAC_FILE
repeat                  : DAC_REP_OFF,DAC_REP_INF,DAC_REP_ON
repeatCount             : An unsigned integer value.
channel_gain_1          : X1,X5
channel_gain_2          : X1,X5
block_size              : An unsigned integer value. The value must be less than the reserved memory in the system divided by 16. By default, 32MB is allocated, the allowed maximum value is 2MB.
adc_size                : Minimum value 12 * (block_size + 128)
dac_size                : Minimum value 12 * (block_size + 128)
gpio_size               : Minimum value 12 * (block_size + 128)
Note
If you run the console client with no parameters, the help menu will open, displaying a list of settings and their respective acceptable values.
The configuration file is located in the same folder as the client application. The file is named config_<board_IP>.json and contains the current settings of the streaming application. The file is created after the first configuration file request.
Convert tool
The convert tool allows you to convert the .bin file format into a .csv, .tdms, or .wav file.
Usage: <path/to/tool>/convert_tool.exe file_name [-i][-s start][-e end][-f format][-t]
        -i get info about file
        -s Segment from which the conversion starts
        -e Segment where the conversion will end
        -f File format. [CSV|WAV|TDMS]. By default used CSV format
        -t Creates test data files for DAC streaming
To convert the binary file, first check the file information using:
.\convert_tool.exe .\<path_to_bin_file>\data_file.bin -i
PS computer\path\to\downloaded\client> .\convert_tool.exe .\output_data\data_file_1.bin -i
Segments count: 18
Samples per segment: 1048576
Samples in last segment: 1048576
Status of last segment: OK

Channel 1:
        Data format type:       Int16
        Samples count:  1048576
        Lost samples count: 0

Channel 2:
        Data format type:       Unknown
        Samples count:  0
        Lost samples count: 0

Channel 3:
        Data format type:       Unknown
        Samples count:  0
        Lost samples count: 0

Channel 4:
        Data format type:       Unknown
        Samples count:  0
        Lost samples count: 0
The file information includes the number of segments into which the data is split. Using the convert tool, you can choose to convert only the specfied portion of the streamed file to the desired forma
.\convert_tool.exe .\<path_to_bin_file>\data_file.bin -s 1 -e 18 -f CSV
The converted file will appear next to the original file.
Note
The file type (CSV, TDMS or WAV) must be capitalised.