3.2.9. RF Signal Recording and Playback script
RF Signal Record and Playback script captures RF signal pulses from Red Pitaya’s analog inputs (IN1/IN2) and immediately replays them on the corresponding outputs (OUT1/OUT2). It leverages Deep Memory Acquisition for high-speed recording and Deep Memory Generation for precise playback.
Once installed, the application is set to start automatically at boot. The application is controlled through the configuration file located in the /opt/redpitaya/bin/ directory.
How it works
Acquisition: Each channel independently monitors its input for trigger conditions
Recording: When triggered, captures the signal using DMA for minimal latency
Generation: Immediately replays the captured signal with configurable burst patterns
Loop: Continues indefinitely until stopped
Features
Dual Channel Processing: Independent IN1→OUT1 and IN2→OUT2 signal recording/playback
Deep Memory Mode: High-speed acquisition using Red Pitaya’s DMA capabilities
Split Trigger Mode: Isolated trigger handling for each channel
Configurable Parameters: Flexible trigger levels, buffer sizes, and burst patterns
Real-time Operation: Low-latency signal processing with threaded architecture
Auto-start: Automatic startup on Red Pitaya boot
Note
This application is not meant to be used in parallel with the Red Pitaya WEB interface. As most processing resources is taken by the Record and Play application, the Web interface is severly slowed down.
Requirements
Hardware
Any Red Pitaya device
Properly terminated analog inputs/outputs (50 Ω impedance matching)
Software
Red Pitaya Linux 2.07 or higher
Nightly Build 637 or higher
Warning
This application consumes significant system resources and cannot run simultaneously with the Red Pitaya Web Interface. The web interface will be severely slowed down or unresponsive.
Please make sure that Red Pitaya inputs and outputs are properly terminated (matched impedance). Failure to do so may lead to undefined behaviour of the Record and Playback application due to the ringing on the transmission line. Red Pitaya fast analog inputs have input impedance of 1 MΩ. The fast analog outputs have output impedance of 50 Ω.
Installation
Quick Start
Connect to your Red Pitaya via SSH
Clone the repository:
git clone https://github.com/RedPitaya/rec_and_play.gitEnable running scripts:
chmod +x ./rec_and_play/setup.shRun setup:
cd rec_and_play && ./setup.shReboot Red Pitaya
Done! Application starts automatically on boot
Option A: Automatic Setup (Recommended)
Establish SSH connection with your Red Pitaya
Download the rec_and_play GitHub Repository to the Red Pitaya.
cd /root
git clone https://github.com/RedPitaya/rec_and_play.git rap
cd rap
Make sure all the scripts are executable and run the setup.
chmod +x setup.sh
./setup.sh
Reboot Red Pitaya.
reboot
Option B: Manual Setup
Establish SSH connection with your Red Pitaya
Download the rec_and_play GitHub Repository to the Red Pitaya.
cd /root
git clone https://github.com/RedPitaya/rec_and_play.git rap
Alternatively, download the repository to your computer and copy the code to the Red Pitaya through the SCP command:
scp -r /<path-to-downloaded-repository>/rec_and_play root@rp-xxxxxx.local:/root
Move to the Record and Play directory on the Red Pitaya.
cd /root/rap
Enter read-write mode and copy the scripts into the /opt/redpitaya/bin folder.
rw
cp -f ./main.py /opt/redpitaya/bin/
cp -f ./config.ini /opt/redpitaya/bin/
(Optional) Add to startup by editing
/opt/redpitaya/sbin/startup.shand adding:export PYTHONPATH=/opt/redpitaya/lib/python/:$PYTHONPATH /opt/redpitaya/bin/main.py
Reboot Red Pitaya.
reboot
Configuration
The Record and Play application uses the configuration file (config.ini) located in /opt/redpitaya/bin/ directory. Each channel (ADC/DAC) is configured independently.
Acquisition Settings (ADC)
Parameter |
Description |
Values |
Unit |
|---|---|---|---|
trigger_level |
Voltage threshold for triggering |
-1.0 to 1.0 |
Volts |
trigger_mode |
Trigger condition |
CH1_PE, CH1_NE, CH2_PE, CH2_NE |
- |
buffer_time |
Recording duration |
1-30 |
µs |
Generation Settings (DAC)
Parameter |
Description |
Values |
Unit |
|---|---|---|---|
signal_source |
Input channel to record |
IN1, IN2 |
- |
count_burst |
Cycles per burst (NCYC) |
≥1 |
count |
repetition |
Number of bursts (NOR) |
≥1 |
count |
repetition_delay |
Delay between bursts |
≥ (buffer_time × count_burst + 1) |
µs |
Sample Configuration
To change the settings, either edit the config.ini file in /opt/redpitaya/bin/ directly, or edit the config.ini file in the record and play directory and run the setup.sh script again. For the changes to take effect, main.py must be restarted (either by rebooting the Red Pitaya or by killing the process and starting it again).
Example of “config.ini”:
[ADC1]
; IN1 Trigger Level in volts
trigger_level=0.1
; Trigger source (Values: CH1_PE, CH1_NE)
trigger_mode=CH1_PE
; Record signal Buffer size in microseconds (min 1 µs)
buffer_time=20

[ADC2]
; IN2 Trigger Level in volts
trigger_level=0.1
; Trigger source (Values: CH2_PE, CH2_NE)
trigger_mode=CH2_PE
; Record signal Buffer size in microseconds (min 1 µs)
buffer_time=20

[DAC1]
; OUT1 Gen signal from source (IN1, IN2). Which input to use for recording data.
signal_source=IN1
; Number of signal repetitions without delays (NCYC - number of cycles/periods in a single burst).
count_burst=1
; Number of repetitions with delay (NOR - Number of Repetitions/Bursts). Each repetition includes `count_burst` (NCYC) recordings without delay.
repetition=3
; Delay between repetitions.
; If there is a "repetition" number of repetitions, then the minimum allowed delay must be no less than:
; buffer_time * count_burst + 1 µS
; Otherwise the signal may break. If there are no repetitions, the value is ignored
; For example. buffer_time = 20, count_burst=2. repetition_delay = 20 * 2 + 1 = 41 µS
repetition_delay=50

[DAC2]
; OUT2 Gen signal from source (IN1, IN2). Which input to use for recording data.
signal_source=IN2
; Number of signal repetitions without delays (NCYC - number of cycles/periods in a single burst).
count_burst=1
; Number of repetitions with delay (NOR - Number of Repetitions/Bursts). Each repetition includes `count_burst` (NCYC) recordings without delay.
repetition=3
; Delay between repetitions.
; If there is a "repetition" number of repetitions, then the minimum allowed delay must be no less than:
; buffer_time * count_burst + 1 µS
; Otherwise the signal may break. If there are no repetitions, the value is ignored
; For example. buffer_time = 20, count_burst=2. repetition_delay = 20 * 2 + 1 = 41 µS
repetition_delay=50
Note
Cross-channel routing is supported but untested (e.g., IN1 to OUT2)
Buffer sizes should be identical for both channels
Timing constraints must be respected to avoid signal corruption
Usage
Starting the Application
The application starts automatically on boot if installed with setup.sh. For manual start:
cd /opt/redpitaya/bin
python3 main.py
Monitoring Operation
Check system logs for status messages
Use
toporhtopto monitor CPU usageApplication runs indefinitely until interrupted
Stopping the Application
Temporary Stop - To stop the application until the next boot:
Press
Ctrl+Cin the terminal, orKill the process in
top(writekand the PID of the process)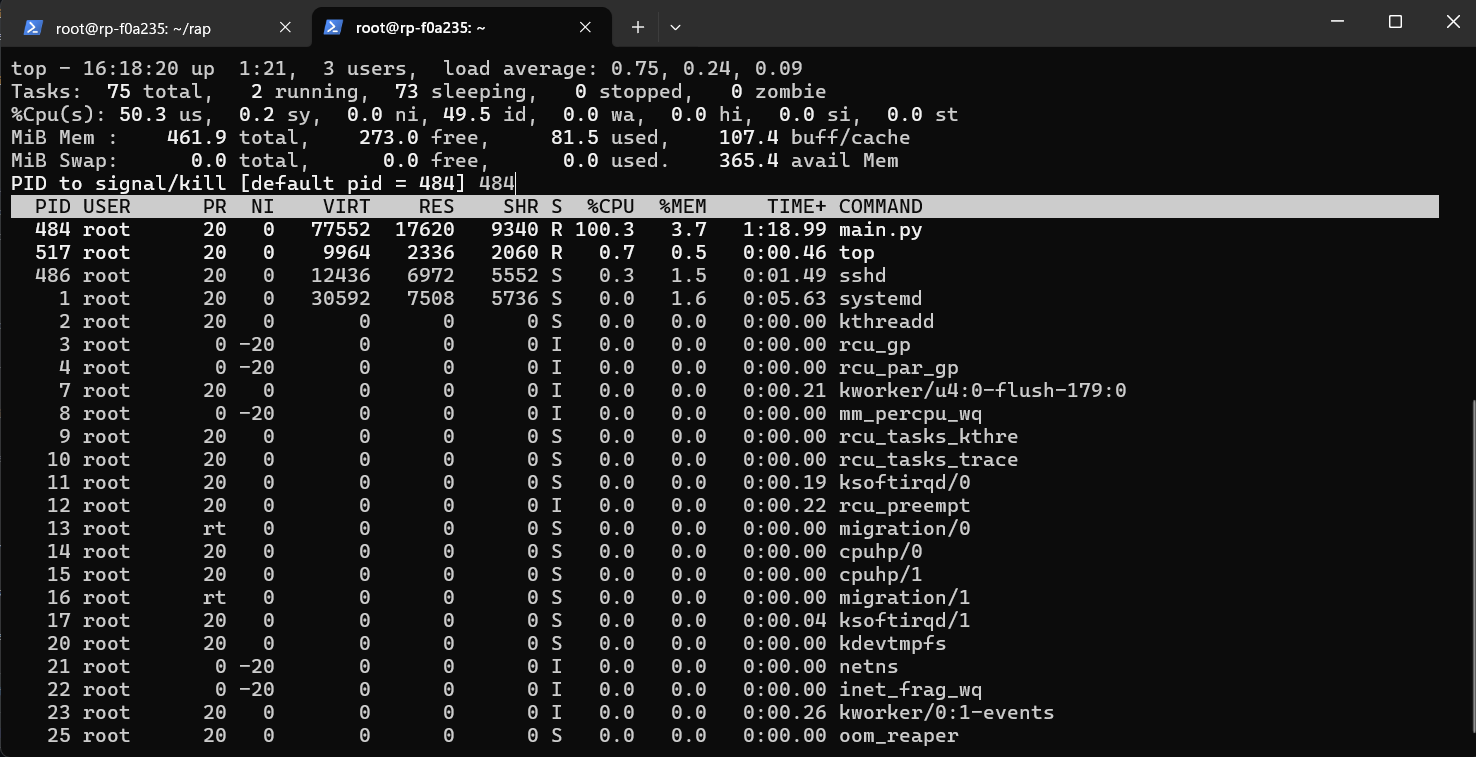
Permanent Disable - First stop the application, then:
Remove it from the
startup.shscript located in /opt/redpitaya/sbin directory (you may have to enterrwmode).Either delete or comment the following lines of code:
# Here you can specify commands for autorun at system startup
export PYTHONPATH=/opt/redpitaya/lib/python/:$PYTHONPATH
/opt/redpitaya/bin/main.py
You can also remove the main.py and config.ini from /opt/redpitaya/bin.
Troubleshooting
Common Issues
Error setting split trigger
Ensure you’re using compatible Red Pitaya OS version
Check that system resources aren’t exhausted
Invalid buffer size
Verify
buffer_timeis between 1-30 µsEnsure integer values in configuration
No signal output
Check input signal levels and trigger settings
Verify proper impedance termination (50 Ω)
Confirm
signal_sourceconfiguration
System slowdown
This is normal - application uses most system resources
Web interface will be unresponsive during operation
Performance Tuning
Reduce
buffer_timefor faster responseAdjust
repetition_delayto prevent signal overlapMonitor CPU usage with
topcommandReduce the value of
LOOP_DELAYto achieve faster trigger checking
FAQ
Q: Can I use this with the Web Interface?
A: No, this application consumes all processing resources and will make the web interface unresponsive.
Q: What’s the maximum buffer size?
A: 30 µs maximum, limited by Red Pitaya’s DMA capabilities.
Q: Can I route IN1 to OUT2?
A: Yes, but this configuration is untested. Use signal_source=IN1 in DAC2 section.
Q: How do I change trigger sensitivity?
A: Adjust trigger_level in ADC sections (range: -1.0 to 1.0 Volts).
Q: Why does the signal break up?
A: Usually due to insufficient repetition_delay. Ensure it’s ≥ (buffer_time × count_burst + 1) µs.
Source code
The Playback and Record source code is available on our GitHub.