System Overview
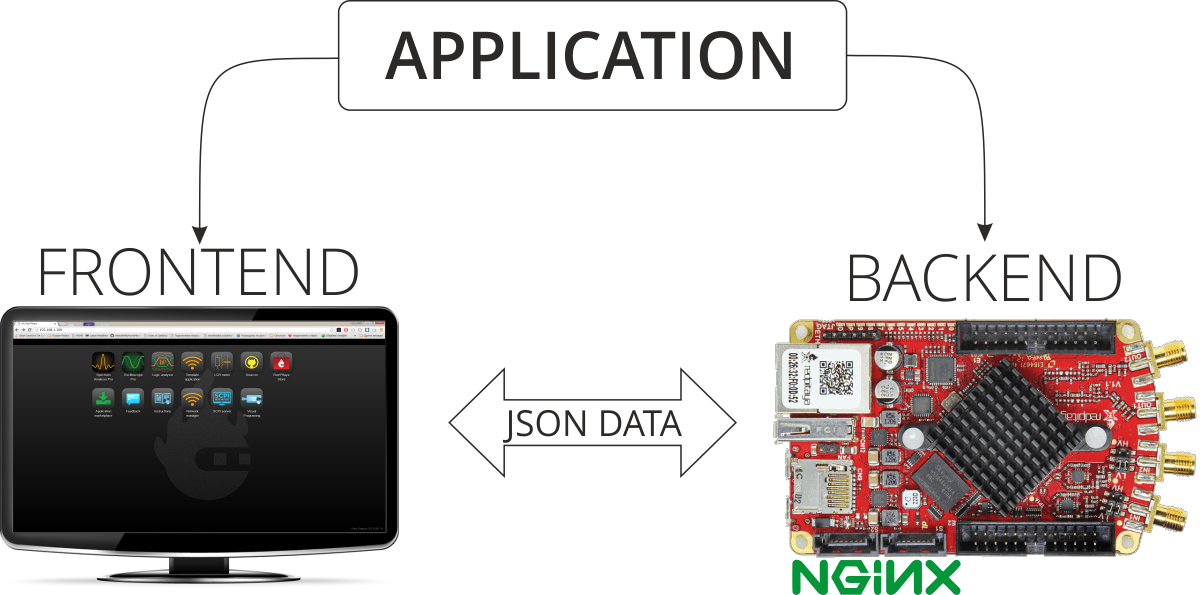
Red Pitaya web applications use a client-server architecture with two distinct components: frontend and backend. Understanding this architecture is essential for developing custom applications.
Architecture Overview
Red Pitaya applications consist of:
Frontend (Client)
The web-based user interface running in your browser. Handles visualization, user input, and presentation logic.
Backend (Server)
The C/C++ controller running on Red Pitaya hardware. Manages hardware control, signal processing, and device state.
These components communicate via WebSocket connections using Red Pitaya’s network APIs, which handle all data transfer automatically. You simply need to follow the API structure described in Add a button to control LED.
Frontend Component

The frontend is the browser-based interface that users interact with directly. It uses modern web technologies:
HTML5 - Application structure and layout
CSS3 - Visual styling and responsive design
JavaScript - Application logic and interactivity
Design philosophy
The frontend should focus on visualization and user interaction. Heavy computation and hardware control belong in the backend. Keep the frontend lightweight and responsive.
Application workflow
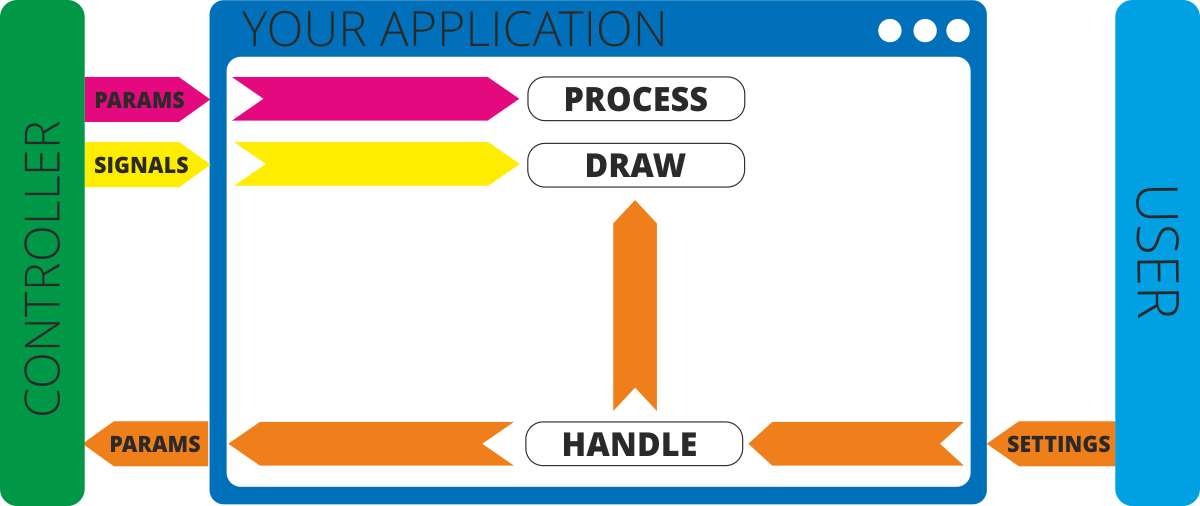
Typical user interaction flow:
User input - User modifies settings in the web interface
Local update - UI may apply visual changes immediately
Backend communication - UI sends parameter changes to the controller via WebSocket
Backend processing - Controller:
Updates internal variables
Modifies device state
Performs calculations based on algorithms
Generates new parameters or signals
Response - Controller sends results back to UI in JSON format
Visualization - UI receives data and updates the display
Backend Component
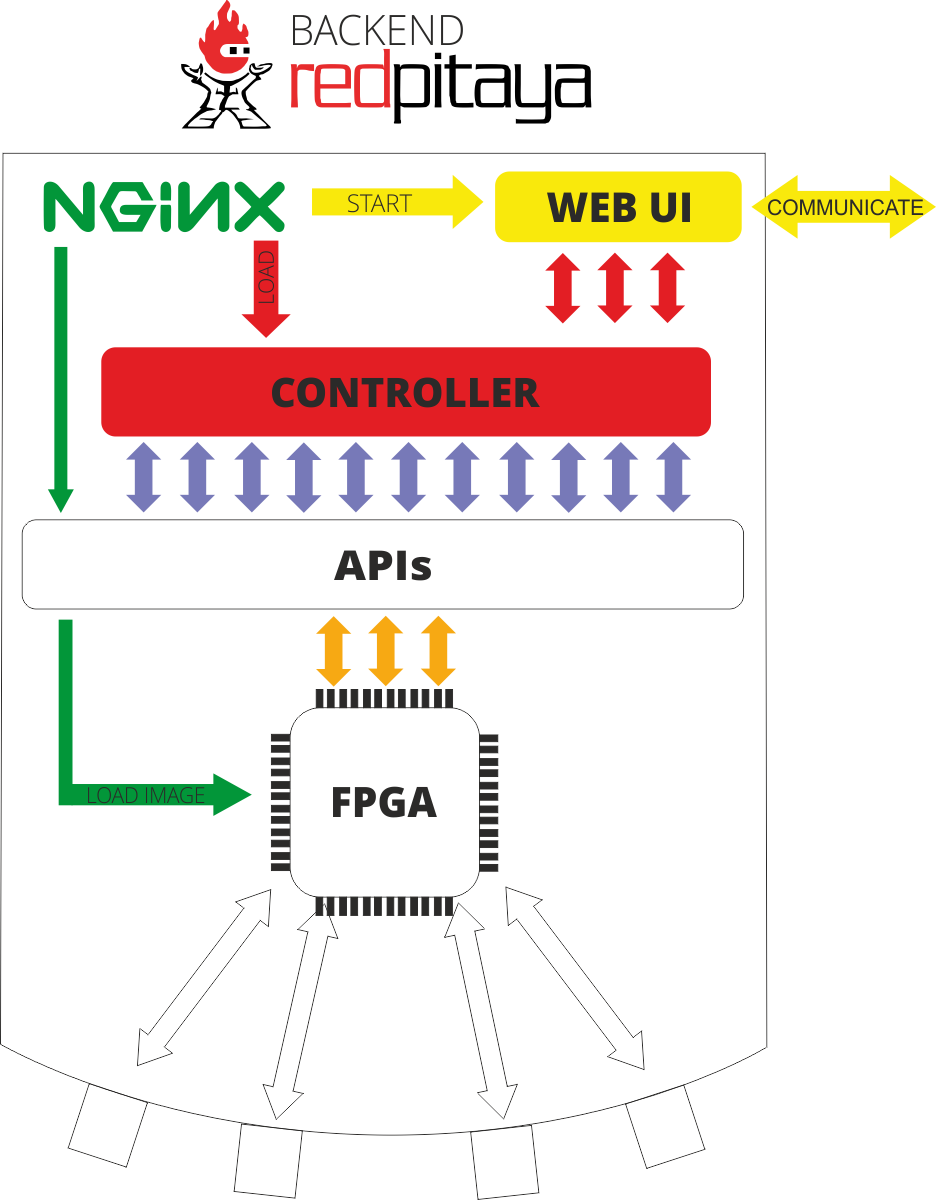
The backend is a shared Linux library (.so file) that serves as your application’s controller. It manages hardware interaction and implements the core application logic.
Backend capabilities
The controller operates with Red Pitaya hardware through:
Parameters
Variables that maintain application state and settings
Signals
Data containers for collecting and transmitting arrays of measurement data
Hardware access
Direct control of:
Digital I/O pins
Onboard LEDs
Fast analog inputs/outputs
FPGA configuration
Note
Parameters and signals are optional. Use only what your application requires.
Nginx Integration
Red Pitaya uses Nginx as the web application platform, providing fast and reliable application hosting.
Application lifecycle
When you launch an application:
Web server - Nginx serves the application’s HTML/CSS/JavaScript files
FPGA loading - System loads the specified FPGA image (or retains current image if none specified)
Controller loading - Application’s .so library is loaded into memory
WebSocket initialization - Controller establishes WebSocket connection
Frontend notification - JavaScript receives confirmation to establish client-side WebSocket
Data exchange - Frontend and backend communicate via JSON messages over WebSocket
Hardware interaction - Controller requests data from Red Pitaya APIs as needed
FPGA operations - APIs manipulate data within the FPGA
Warning
Single module limitation: Nginx can only load one controller module at a time. Loading a new module automatically unloads the previous one. If your controller encounters internal errors, Nginx will not automatically reload it - error handling is the developer’s responsibility.
Note
Always verify you’re using the correct FPGA image when developing applications. The FPGA configuration must match your controller’s requirements.
Additional Resources
Step-by-step tutorials for creating web applications are available in the Web Tutorial Example repository.