2.1.6. Streaming
The Streaming application enables users to stream data from Red Pitaya to:
A file saved on the Red Pitaya SD card
A file saved on a remote computer via the ethernet protocol (UDP or TCP).
The user can set:
The sampling frequency (rate)
Input channel count (Channel 1, Channel 2, or Both (4 Channels for STEMlab 125-14 4-Input))
Input channel resolution (8 or 16 bits)
Input attenuation (HV/LV mode) (for 125-xx, a switch of the jumper is required)
Whether to use the calibration or not (for 125-xx, the filter is also calibrated)
RAW / Volts mode
The number of samples or unlimited sampling
Streamed data can be stored into:
Standard audio WAV file format
Technical Data Management Streaming (TDMS) file format
Fast and compact binary format (BIN). It can be converted to CSV format.
Max. streaming speeds (per board) are limited to:
10 MB/s for streaming to an SD card (SD card class 10 is recommended for optimal streaming performance)
20 MB/s for streaming over 1 Gbit network (A direct connection is recommended to achieve the best streaming performance)
Note
The maximum continuous streaming speeds (per board) are limited to the total input data rate, not the network transfer rates. If the maximum data rate is exceeded, the data pipeline inside Red Pitaya starts to clog, which leads to unpredictable behaviour. Here are a few examples of maximum data rates:
One channel, 8-bits per sample: Max sampling frequency 20 MHz.
One channel, 16-bits per sample: Max sampling frequency 10 MHz.
Two channels, 8-bits per sample: Max sampling frequency per channel 10 MHz (assuming same frequencies for both channels)
Two channels, 16-bits per sample: Max sampling frequency per channel 5 MHz (assuming same frequencies for both channels)
If acquiring a limited amount of samples in a short duration, it is possible to reach higher sampling frequencies (up to the sampling speed of fast analog inputs).
Minumum streamed data size
To increase the efficiency of the application, there is a minimum data size that can be sent through the network. This can have a big impact at high decimation values, as it takes a long time to fill a chunck. If the stream is stopped before a chunck is completed, the data is discarded and the saved file has a size of 0 b.
Here are the minimum chunck limitations sorted by file type and units:
File type \ Units |
VOLTS |
RAW |
|---|---|---|
WAV |
128.043 kb |
64.043 kb |
TDMS |
128.133 kb |
64.133 kb |
BIN |
64.090 kb |
64.090 kb |
Note
We plan to expand the functionality by adding the generation to the Streaming application in the future. For now, it is possible for a user to implement it by themselves.
2.1.6.1. Getting started with the Red Pitaya streaming feature
Run the Streaming app from the Red Pitaya Web interface

2.1.6.2. Stream locally to a file on Red Pitaya’s SD card
Configure the stream properties & click RUN

Example: streaming on ch1, 8-bit resolution, 5.208 MS/s into TDMS file format
Press STOP to stop streaming
Click Browse to open the data file directory. Each data stream is split into three sections; DATA (collected data stream), .log (data log of the specific stream), .log.lost (report on lost packets). Click on the selected file to download it from Red Pitaya to the computer.

Open the file in a program that supports the selected file format, visualisation, and processing, such as DIAdem for TDMS files, or Audacity for WAV.
Configure the stream properties & click RUN

Example: streaming on CH1 and CH2, 8-bit resolution, 100 ksps into WAV file format
Press STOP to stop streaming
Check the Files on SD card section for the data files. Each data file has three buttons; LOG (data log of the specific stream), LOST (report on lost packets), and DOWNLOAD (collected data stream). Click on the selected file to download it from Red Pitaya to the computer.
Open the file in a program that supports the selected file format, visualisation, and processing, such as DIAdem for TDMS files, or Audacity for WAV.
2.1.6.3. Streaming to a remote computer via Command Line or Terminal
Download the streaming client for your computer. Clients are located on the board itself and can be downloaded from there.

Configure the stream properties & click RUN

Example: streaming on CH1, 16-bit resolution 5 Msps, TCP
Execute the streaming client via Command Line or Terminal on a remote computer (copy the IP address from the web interface and choose the required file format).
rpsa_client.exe -h 192.168.1.29 -p TCP -f ./ -t wav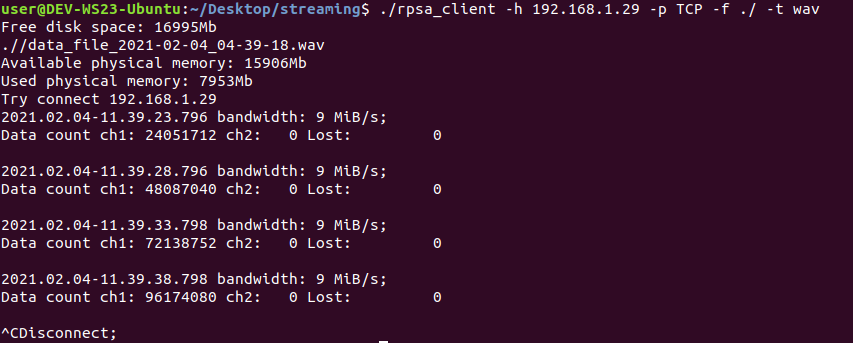
Data streaming can be stopped by pressing Ctrl+C.
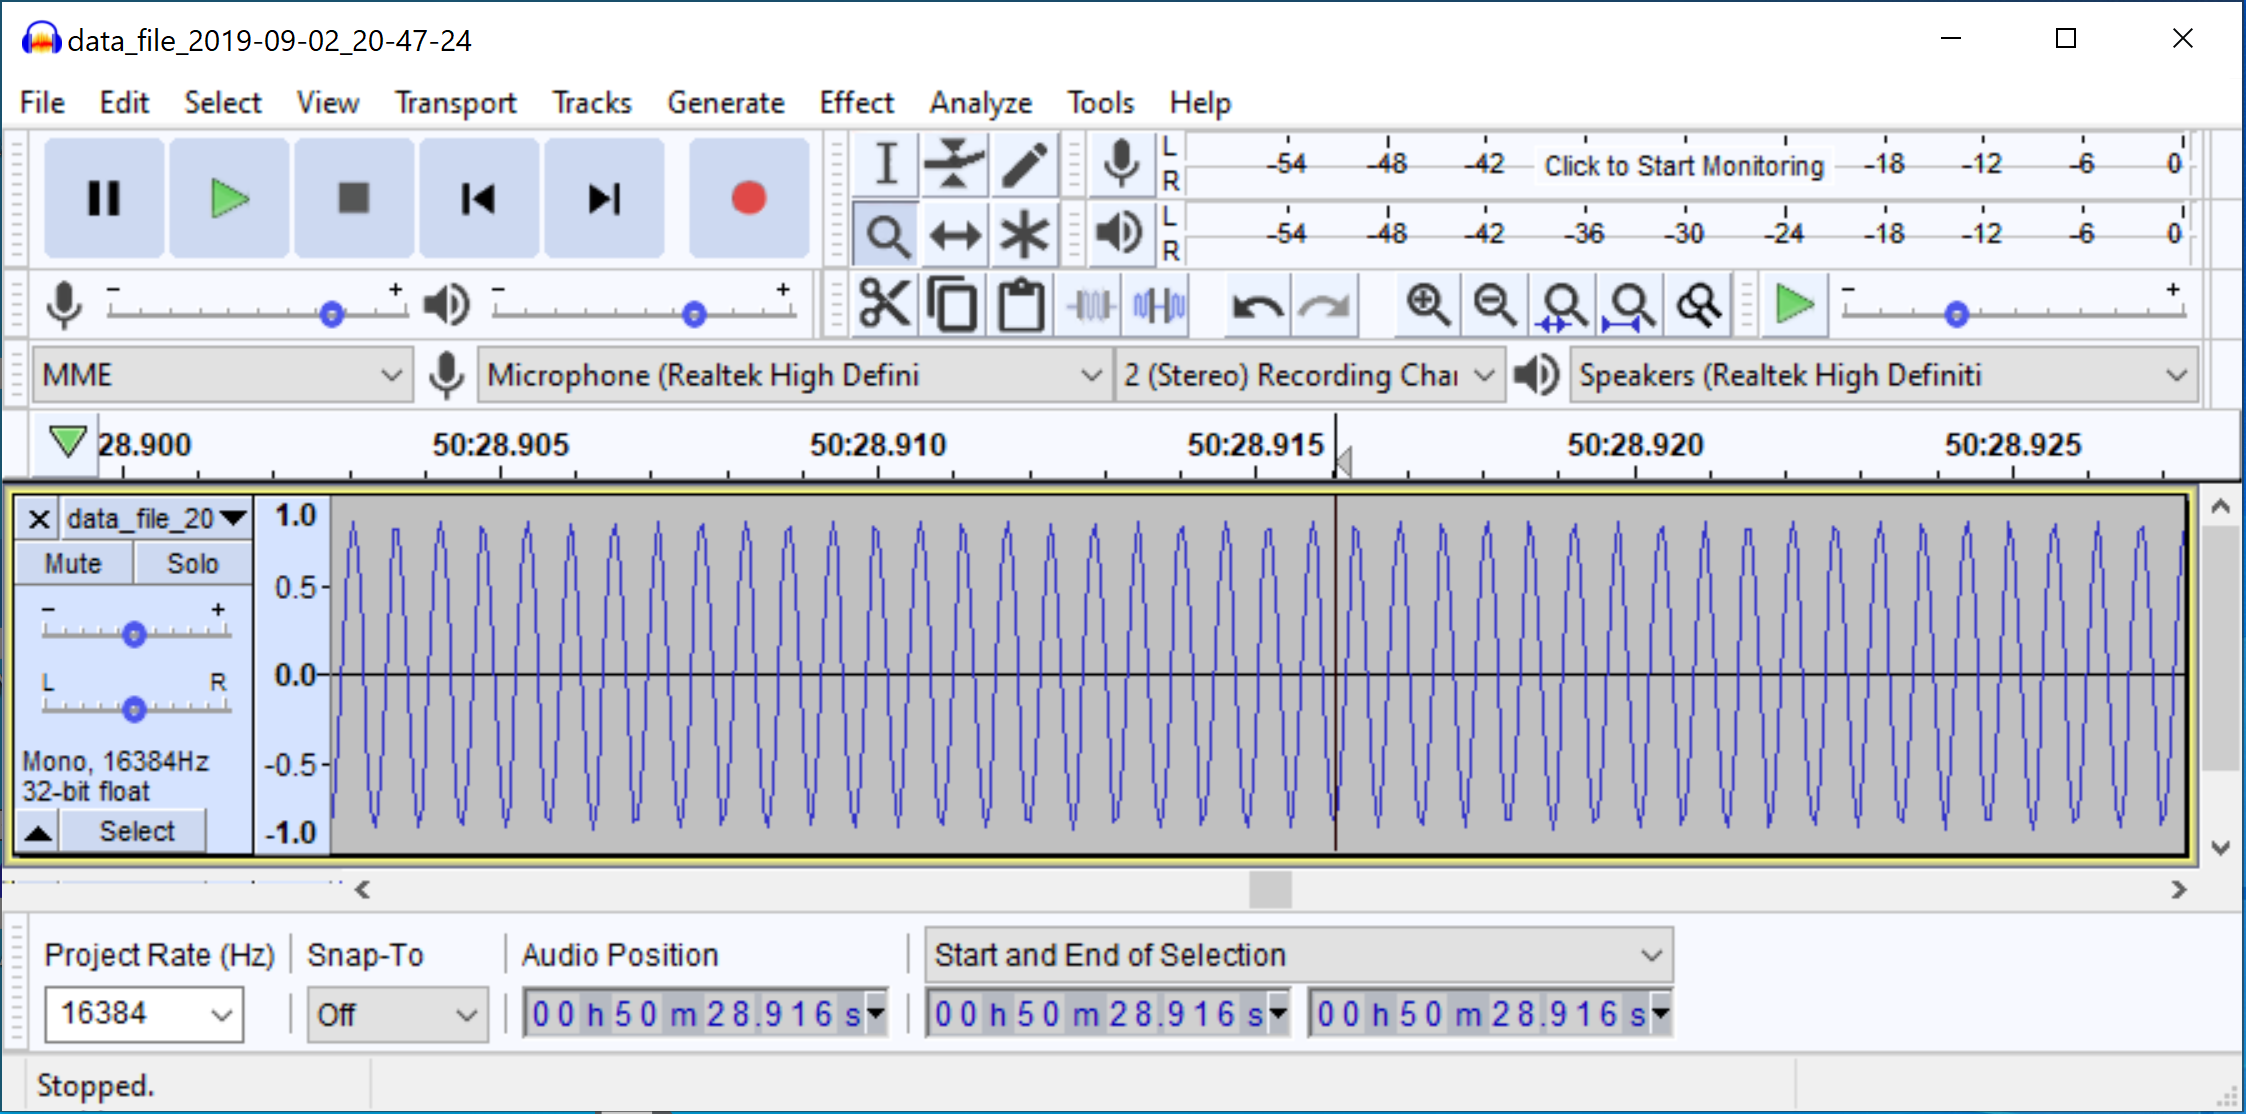
The created wav file can be read or viewed in Audacity or another program that supports WAV file type:
rpsa_client.exe -h 192.168.1.29 -p TCP -f ./ -t tdms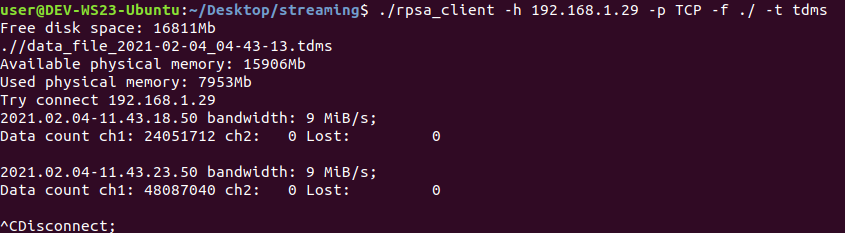
Data streaming can be stopped by pressing Ctrl+C.
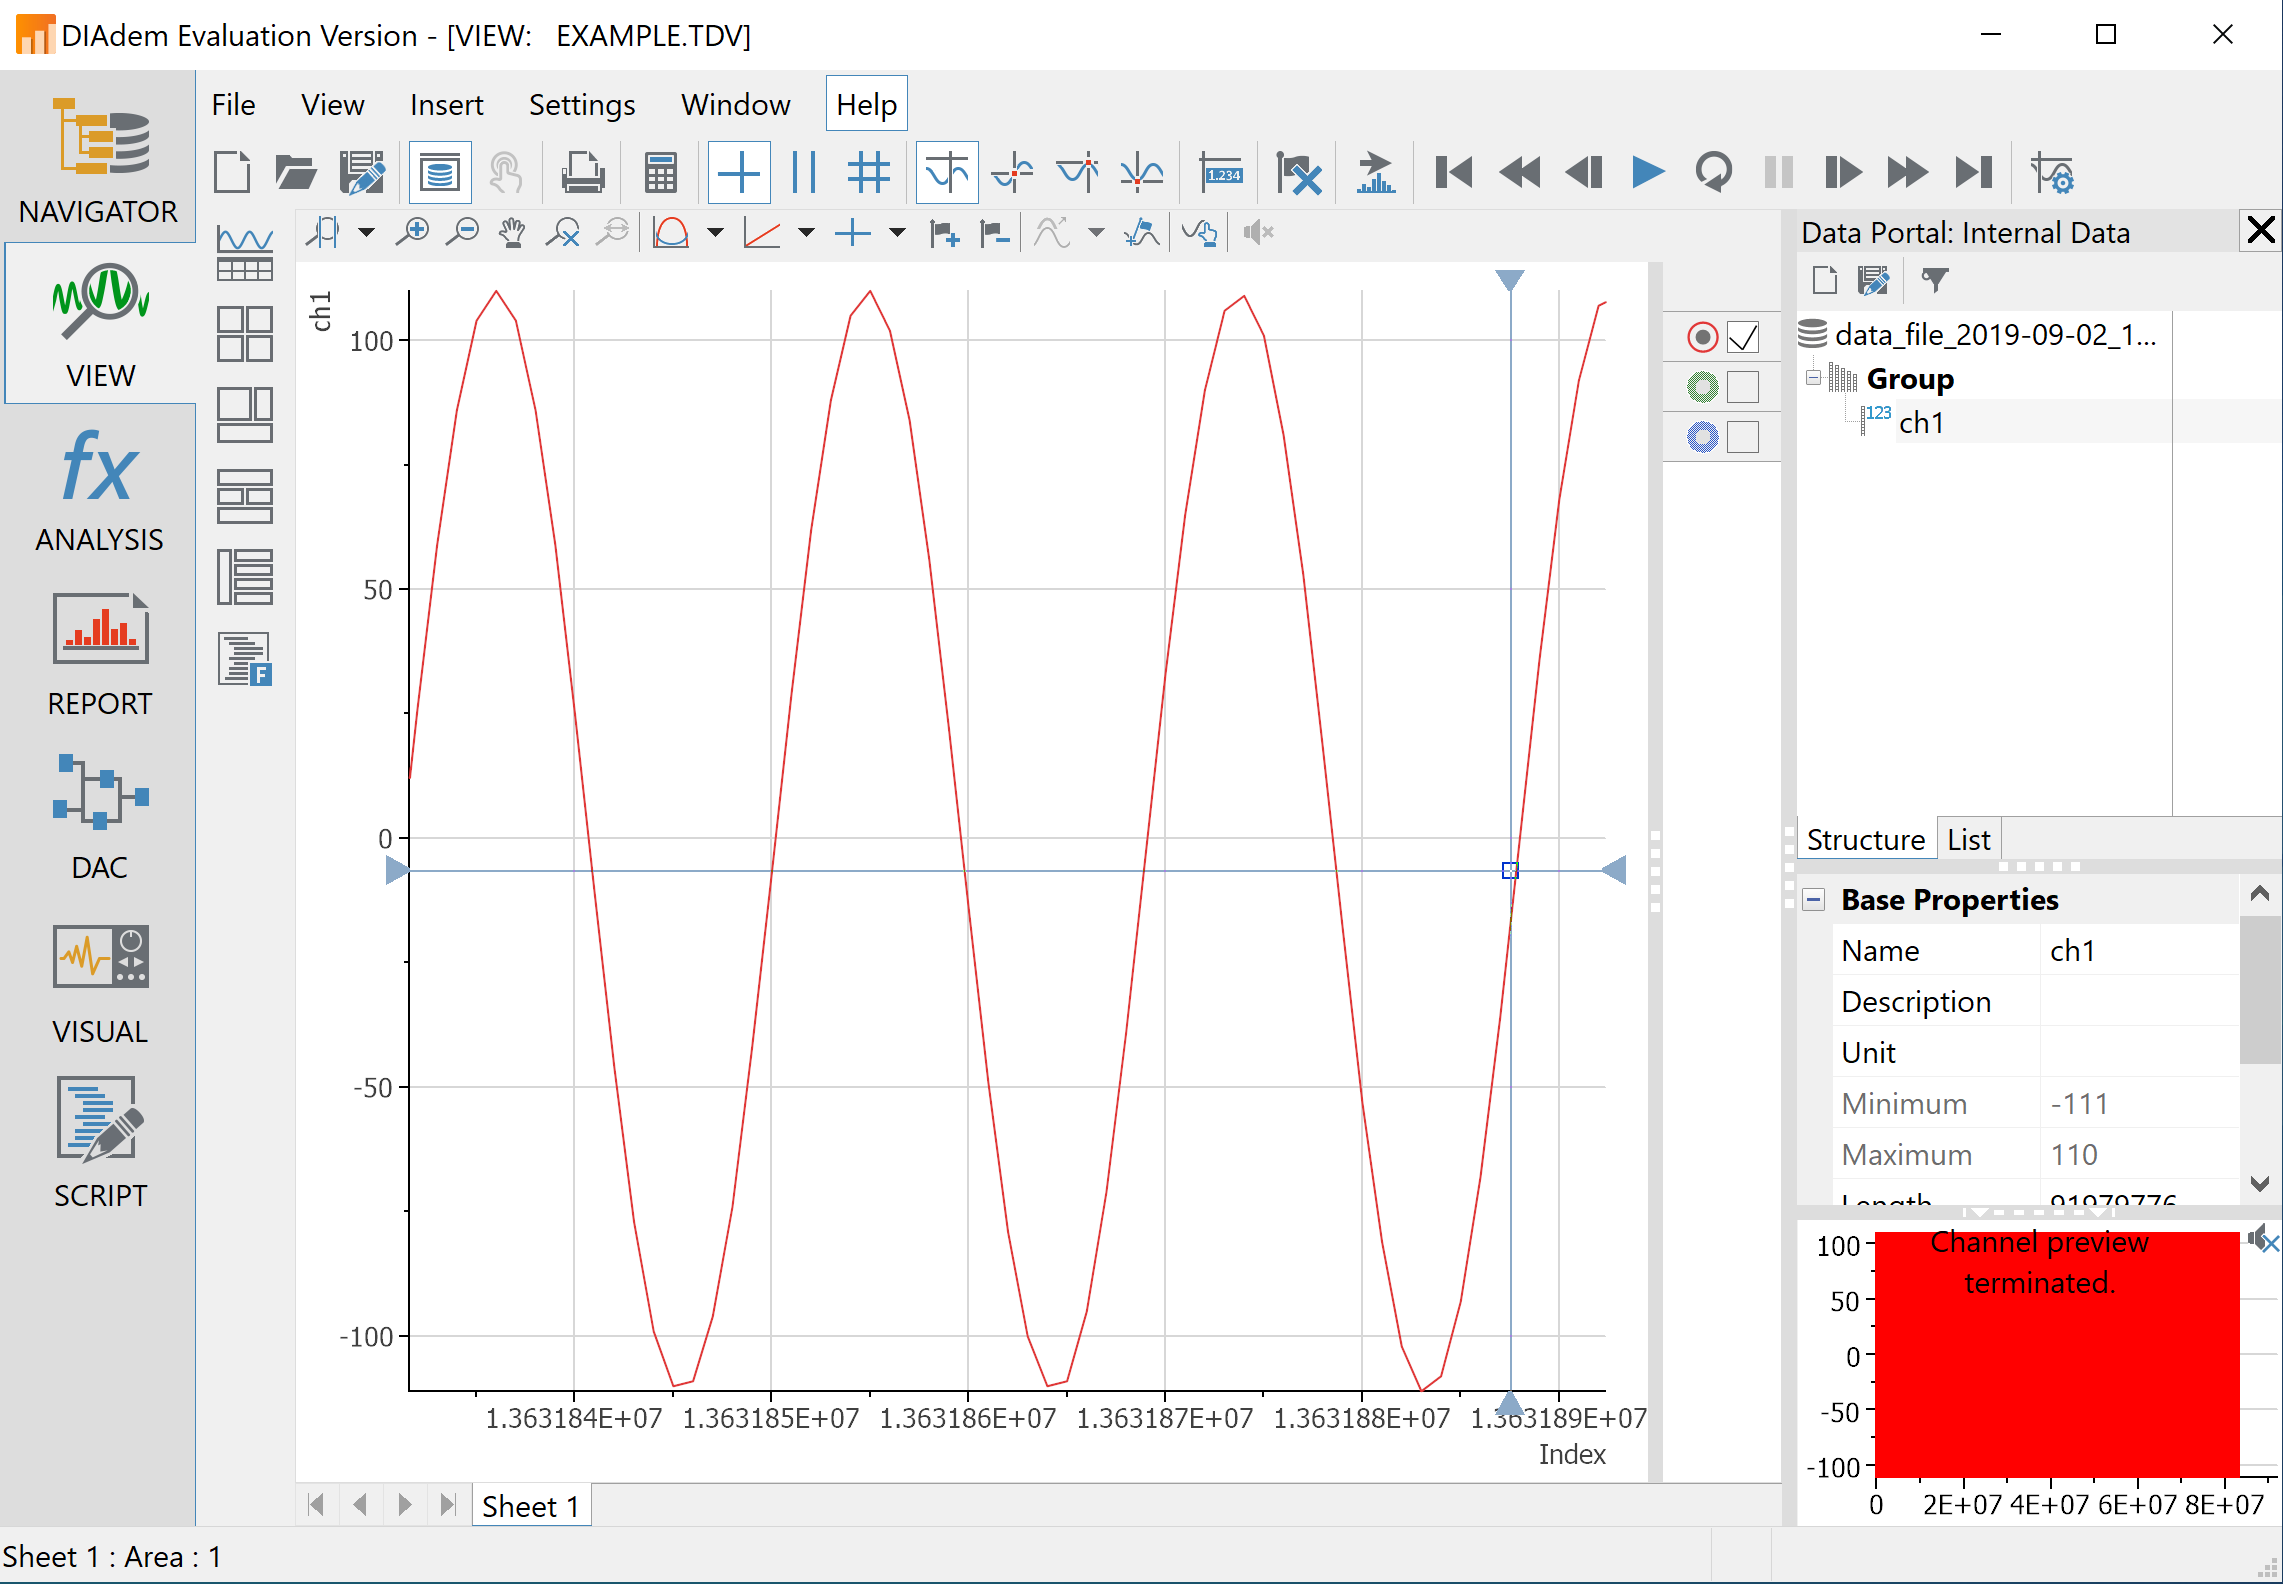
The created tdms file can be read or viewed in DIAdem or another program that supports TDMS file type.
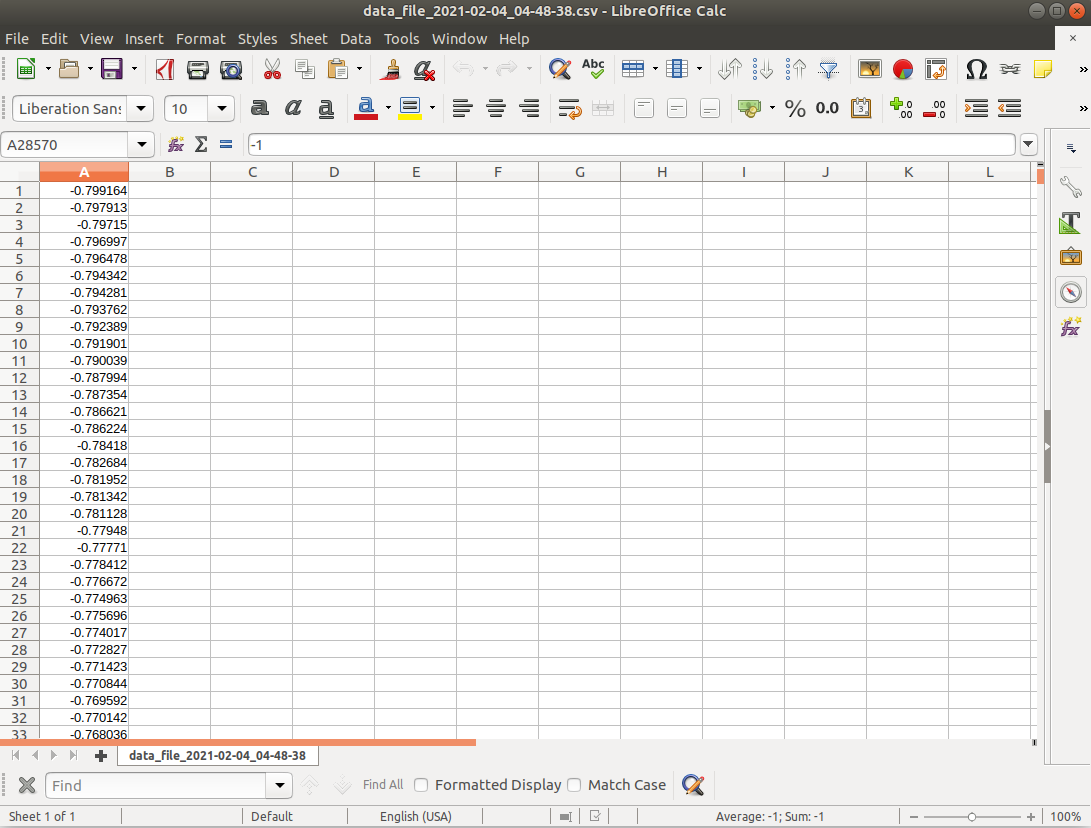
rpsa_client.exe -h 192.168.1.29 -p TCP -f ./ -t csv -s 100000 -v
The application saves data from the board in binary (BIN) format.

The binary file can be converted using the convert_tool application.
The created CSV file can be opened with any text editor, spreadsheet editor, or any other application that supports the CSV file type:
Note
Using the convert_tool application you can also see the structure of the received file and the state of the file.

Download the command line streaming client for your computer. Clients are located on the board itself and can be downloaded from there.

Configure the stream properties & click RUN

Example: streaming on CH1 and CH2, 16-bit resolution, 100 ksps, TCP
Execute the streaming client via Command Line or Terminal on a remote computer (copy the IP address from the web interface and choose the required file format).
rpsa_client.exe -h 192.168.1.29 -p TCP -f ./ -t wav
Data streaming can be stopped by pressing Ctrl+C.
The created wav file can be read or viewed in Audacity or another program that supports WAV file type:
rpsa_client.exe -h 192.168.1.29 -p TCP -f ./ -t tdms
Data streaming can be stopped by pressing Ctrl+C.
The created tdms file can be read or viewed in DIAdem or another program that supports TDMS file type.
rpsa_client.exe -h 192.168.1.29 -p TCP -f ./ -t csv -s 100000 -v
The application saves data from the board in binary (BIN) format.
The binary file can be converted using the convert_tool application.
The created CSV file can be opened with any text editor, spreadsheet editor, or any other application that supports the CSV file type:
Note
Using the convert_tool application you can also see the structure of the received file and the state of the file.
2.1.6.4. Streaming to a remote computer via Desktop Application (Linux, Windows)
Note
The streaming client application currently does not work on Windows 11. This issue will be fixed in the future.
The other option for streaming is utilyzing the Desktop Application.
Download the client application
Files with clients are available here.
Files with clients are in the Streaming Application (Data Stream Control). You can download it from Red Pitaya itself.

Unzip and run the client
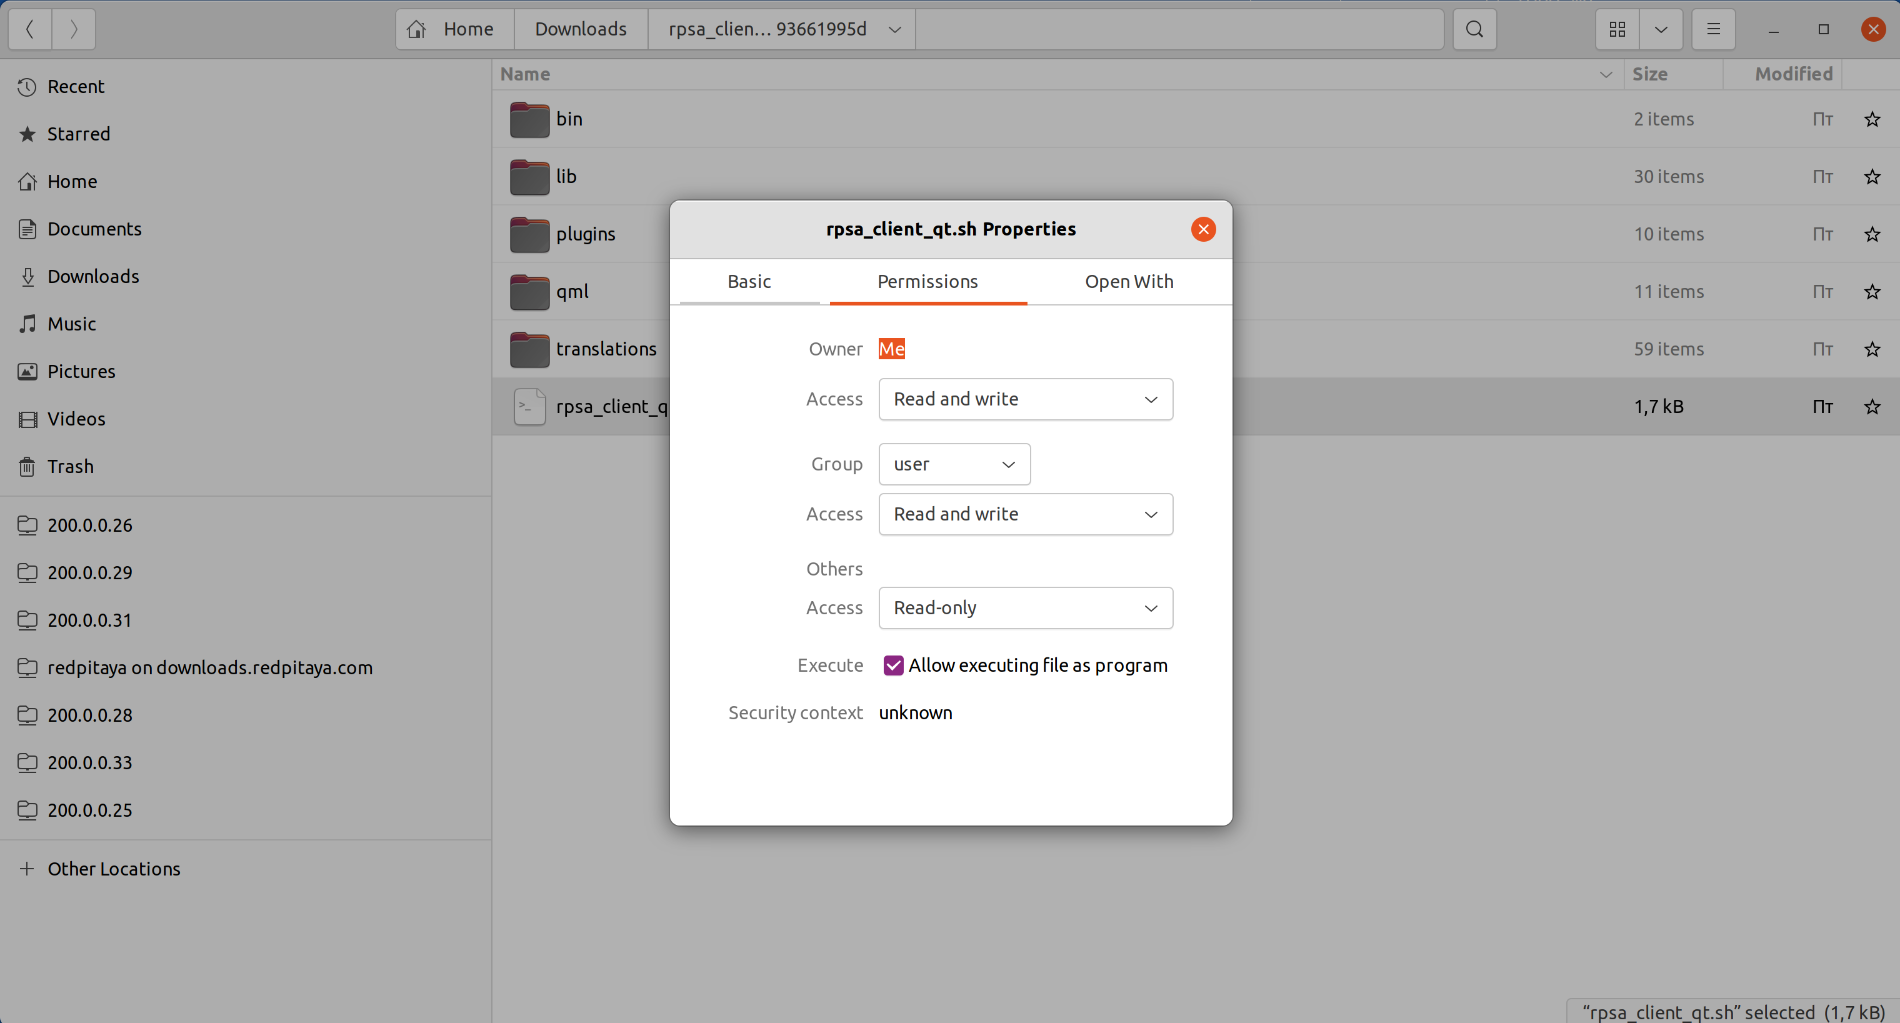
For Linux clients, after unpacking, the files (rpsa_client_qt.sh, bin/rpsa_client_qt) must be made executable.
For Windows clients, you need to grant access to the network.
Note
It is possible that an Antivirus program might block the desktop client. If you experience this issue, we recommend whitelisting the Streaming Client folder.
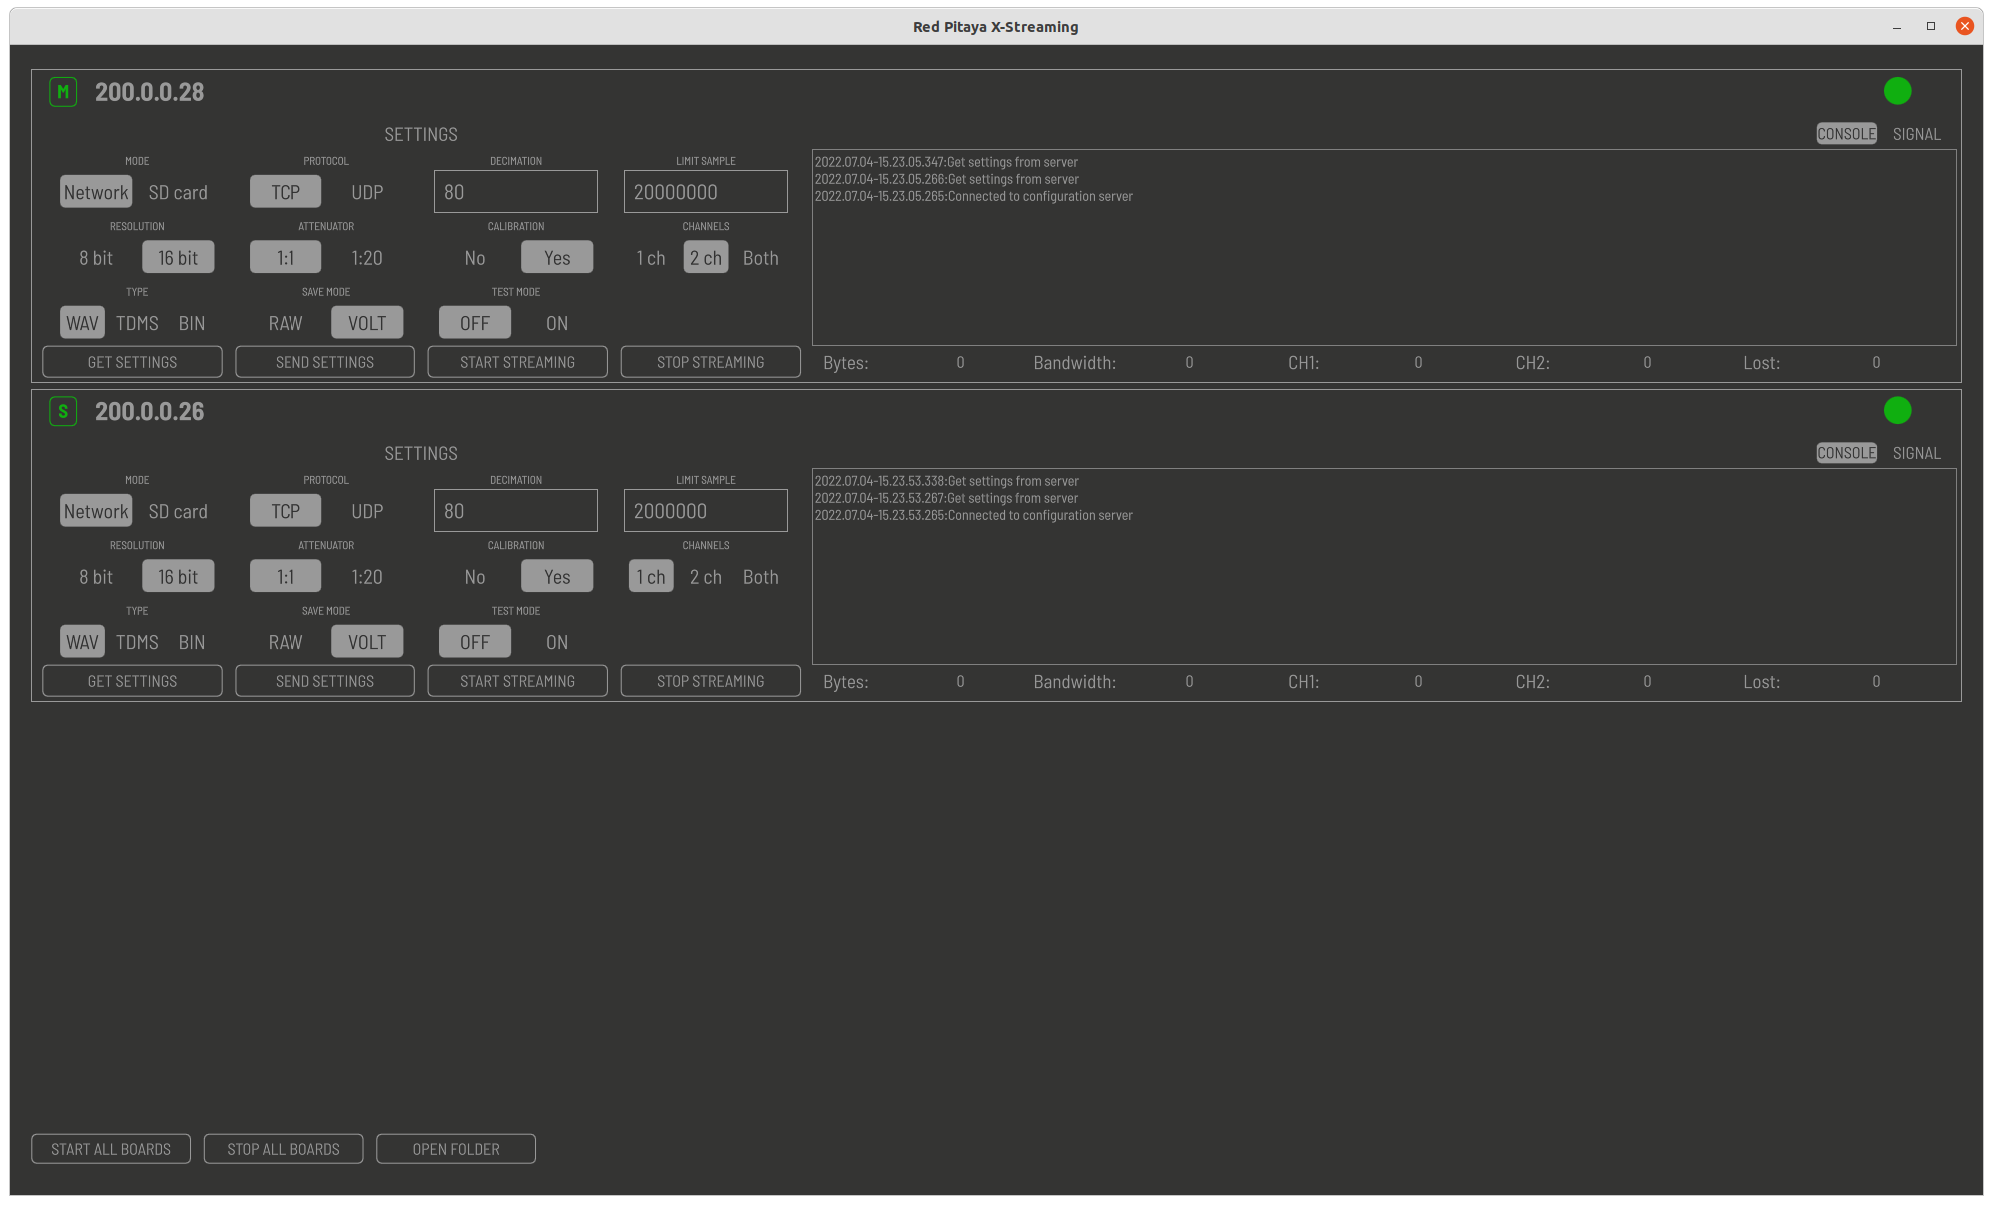
Once the Desktop application is running it automatically detects boards on the network, if the Streaming Application is running on them. The boards and the client must be on the same network.
2.1.6.5. Source code
The Streaming application source code is available on our GitHub.