1.2.1.1. Wired
1.2.1.1.1. Local Area Network (LAN)
This is the most common and recommended way of connecting and using your Red Pitaya boards. Your LAN network needs to have DHCP settings enabled, which is the case in the majority of the local networks. With this, a simple plug and play approach is enabled. Having the Red Pitaya board connected to the local network will enable quick access to all Red Pitaya applications using only your web browser. Simply follow these 3 simple steps:
Connect the power supply to the Red Pitaya board,
Connect the Red Pitaya board to the router or directly to the PC Ethernet socket,
Open your web browser and type:
rp-xxxxxx.local/into the URL field.
Note
xxxxxx are the last 6 characters from the MAC address of your Red Pitaya board.
The MAC address is written on the Ethernet connector.
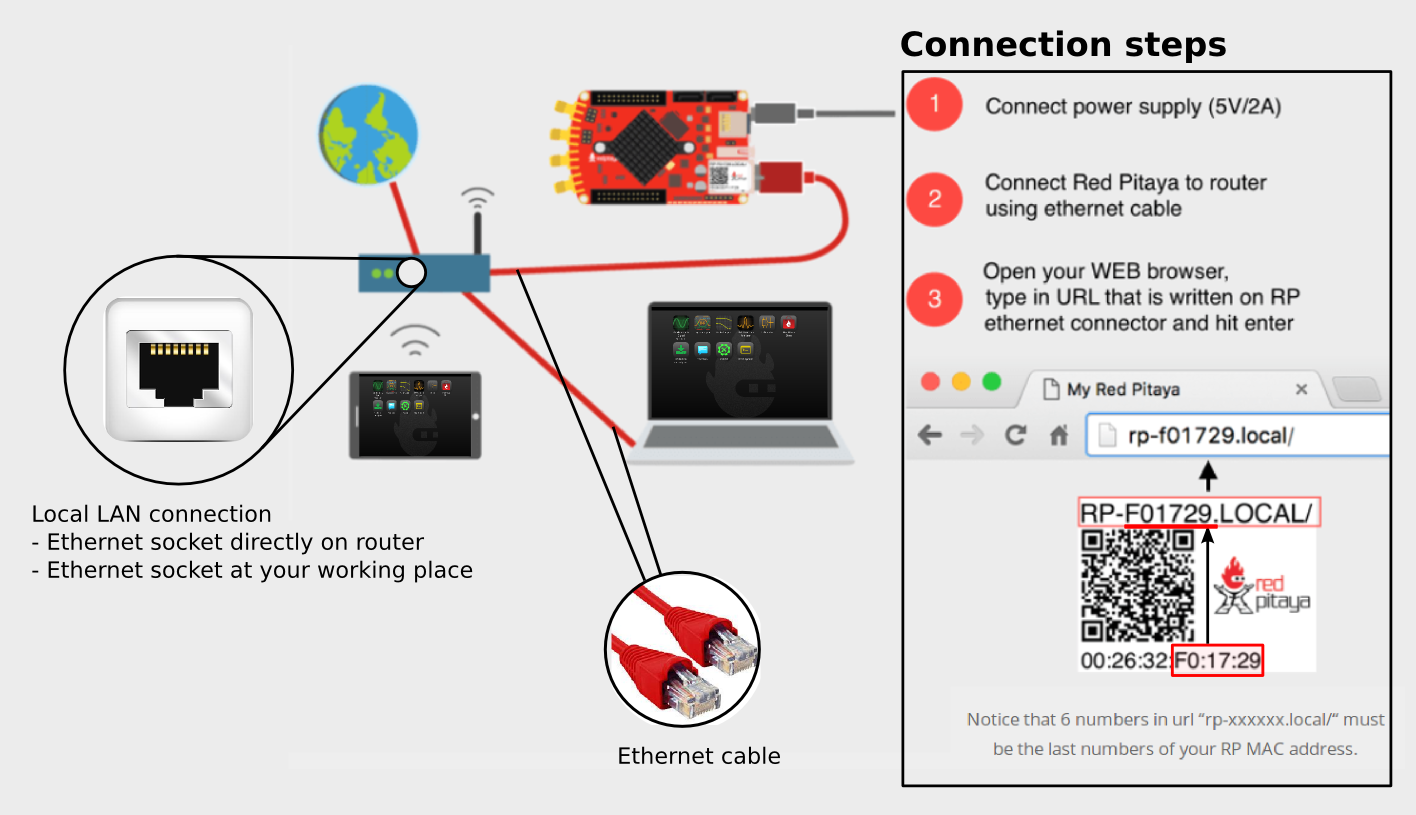
Figure 1: Connecting your Red Pitaya board to the LAN network.
After the third step you will get a Red Pitaya main page as shown below.
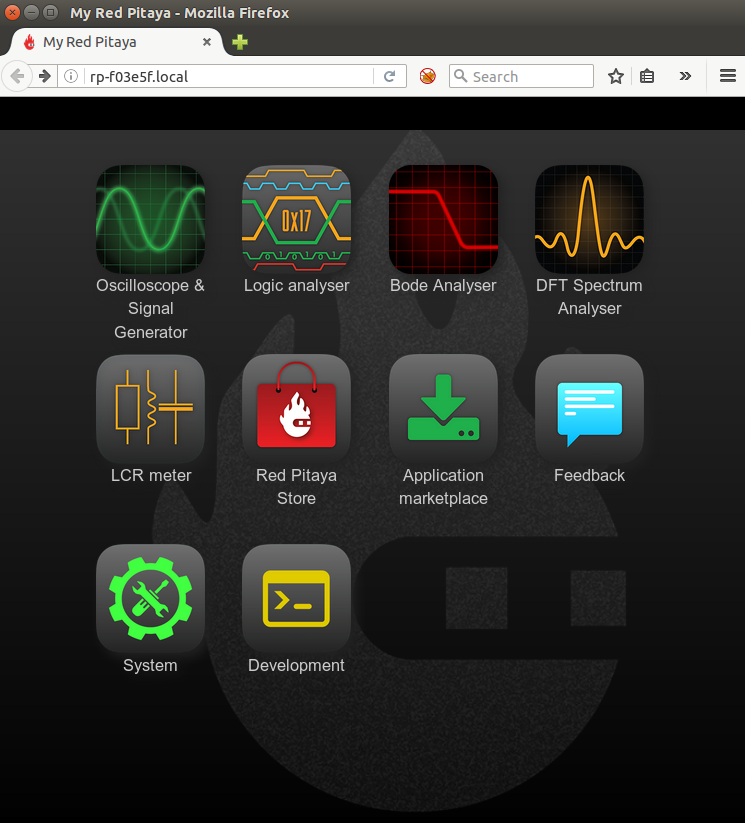
Figure 2: Red Pitaya main page user interface.
1.2.1.1.2. Direct Ethernet cable connection
Plug the ethernet cable from your PC to the Red Pitaya board.

Here is the procedure for a direct Ethernet connection:
Windows (the Bonjour service must be installed for Win 7/8)
Connect the Ethernet cable and wait approx. 30 sec
Open the web browser and type rp-xxxxxx.local/ in the URL field
Linux / Ubuntu
Open Network settings, Edit Connection, and for the LAN network, select Method Share to other computers under IPv4 Settings.
Connect the Ethernet cable and wait approx. 30 sec
Open the web browser and type rp-xxxxxx.local/ in the URL field
MAC
Connect the Ethernet cable and wait approx. 30 sec
Open the web browser and type rp-xxxxxx.local/ in the URL field
Note
xxxxxx are the last 6 characters from the MAC address (on the Ethernet connector)
Warning
If you experience some problems when using the Direct Ethernet Connection described above, try to disable the WiFi connection on your PC (if it has been enabled) and reset the Red Pitaya board (power off/on). If the problem persists, you can try the STATIC IP configuration described below.
1.2.1.1.3. Static IP configuration
This type of connection requires additional settings on your PC and Red Pitaya board.
Note
This connection is also arranged via the Network Manager application, so users should first have access to the LAN (DHCP) network in order to arrange a static IP on the Red Pitaya board.
The first step is connecting the Red Pitaya board directly to the LAN network and setting a static IP on it.
Establish a direct Ethernet cable connection.
Connect to your Red Pitaya main web page.
Go to System and start the Network Manager application.
Choose the
Staticoption. Then, input the static IP and click Apply.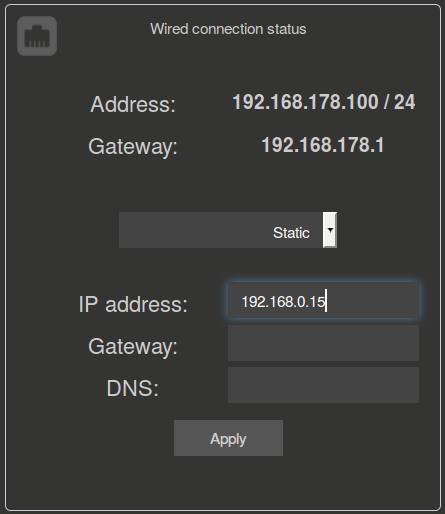
The next step is to set a network setting on the PC. Here is an example on Ubuntu 14.04, but it is very similar on other operating systems as well. To set up a direct connection with your PC, follow these next steps:
Launch Network Manager on your computer.
Add a new Ethernet connection. (There is no need to create a new network since you can set static IP settings on the existing network and skip all steps up to step 8.)

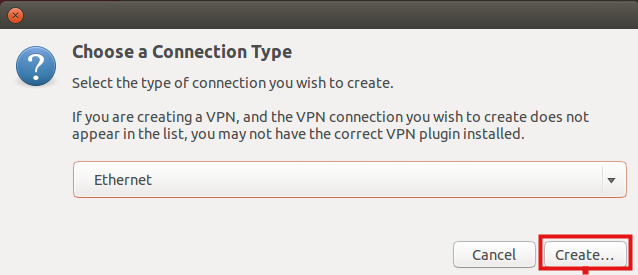
Select Ethernet connection and press Create button.
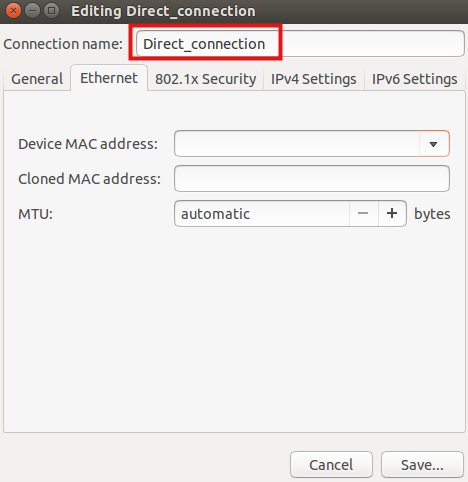
Select the name of the new Ethernet connection.
Select Method – Manual, press the Add button, and insert:
The static IP address of your PC (must be different from the IP address of the Red Pitaya board),
Netmask (input: 255.255.255.0)
Gateway (can be left empty)
DNS servers (can be left empty) and click the Save button.

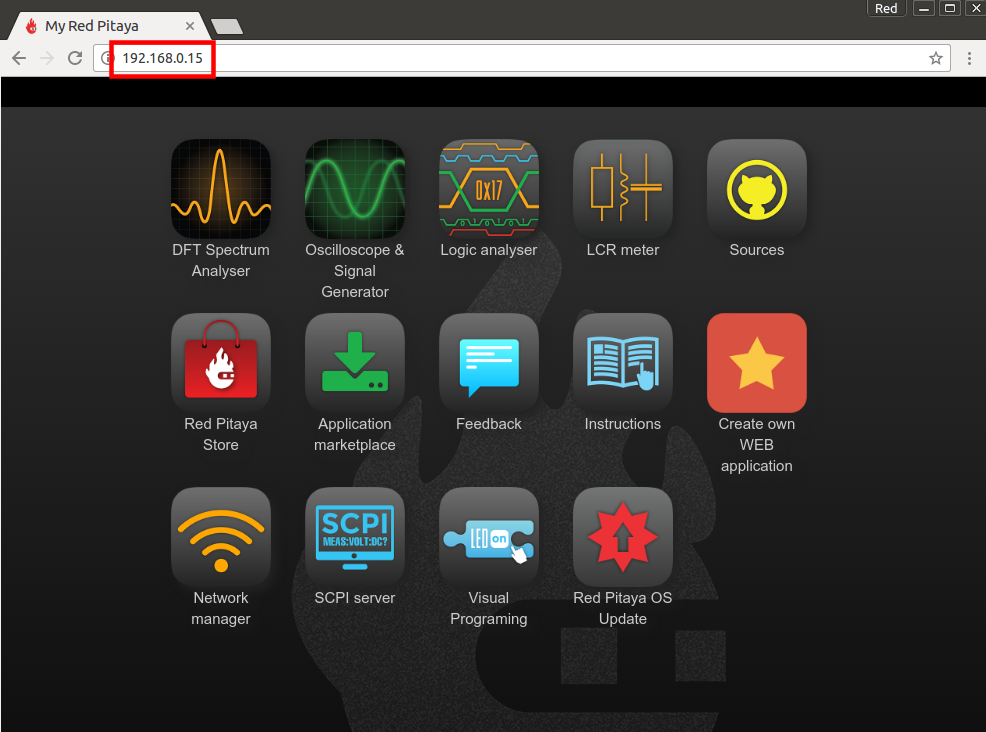
Note
Once you have these settings arranged, connect the Ethernet cable between your Red Pitaya board and PC, open a web browser, in the web browser URL field, input the chosen Red Pitaya board static IP (in our example, 192.168.0.15) and press enter.
1.2.1.2. Wireless
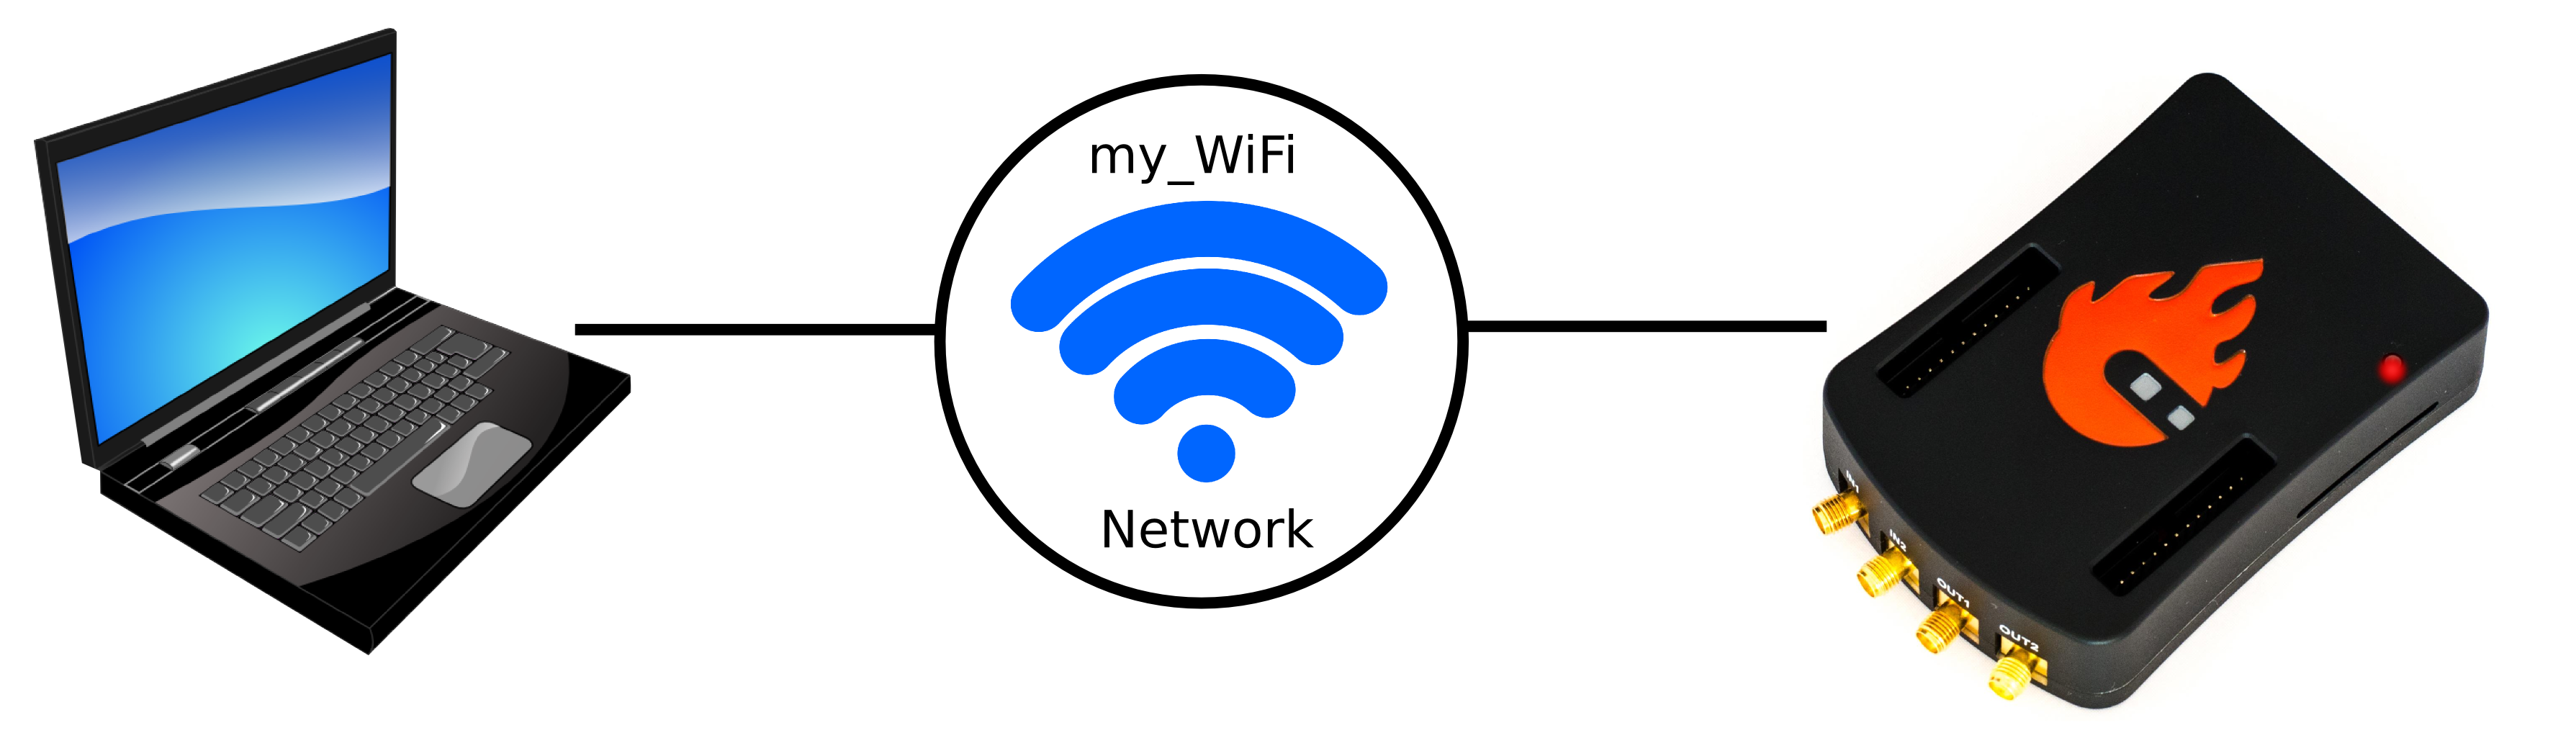
1.2.1.2.1. Wireless Network Connection
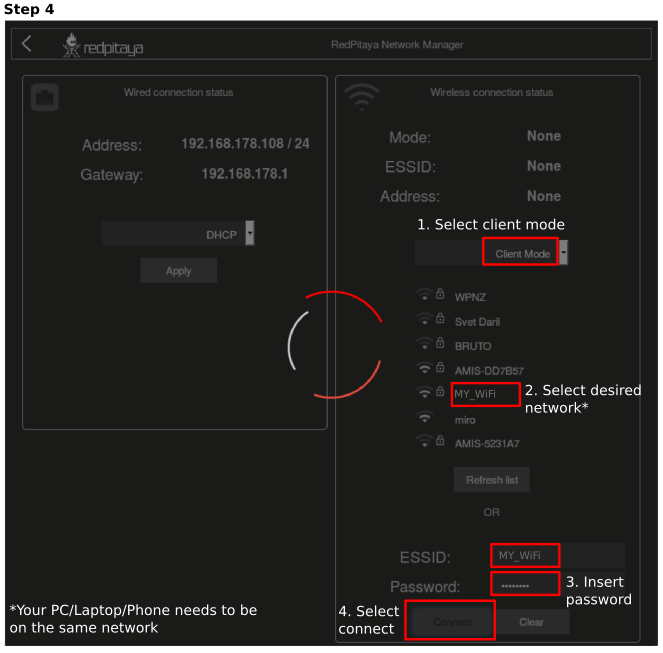
To establish a WiFi interface with your Red Pitaya, first, establish a direct ethernet connection. Open the Red Pitaya main webpage and start the Network Manager application. The Network Manager provides access to all network settings of the Red Pitaya board. Select the desired WiFi network, input the password, click “Connect”, and wait for Red Pitaya to configure the settings. Disconnect the ethernet cable from the board and restart it. Red Pitaya should automatically connect to the WiFi.
Note
A WiFi dongle is required to connect the Red Pitaya to a WiFi network (Red Pitaya WiFi dongle). Please note that not all are compatible.
How to connect your Red Pitaya board over a WiFi network:
Start your Red Pitaya web user interface (Use the connection described in LAN connection)
Open Network Manager application
Insert the WiFi dongle into the USB port on the Red Pitaya board. The recommended WiFi USB dongle is the Edimax EW7811Un V2. In general, all WiFi USB dongles that use the RTL8188CUS chipset should work.
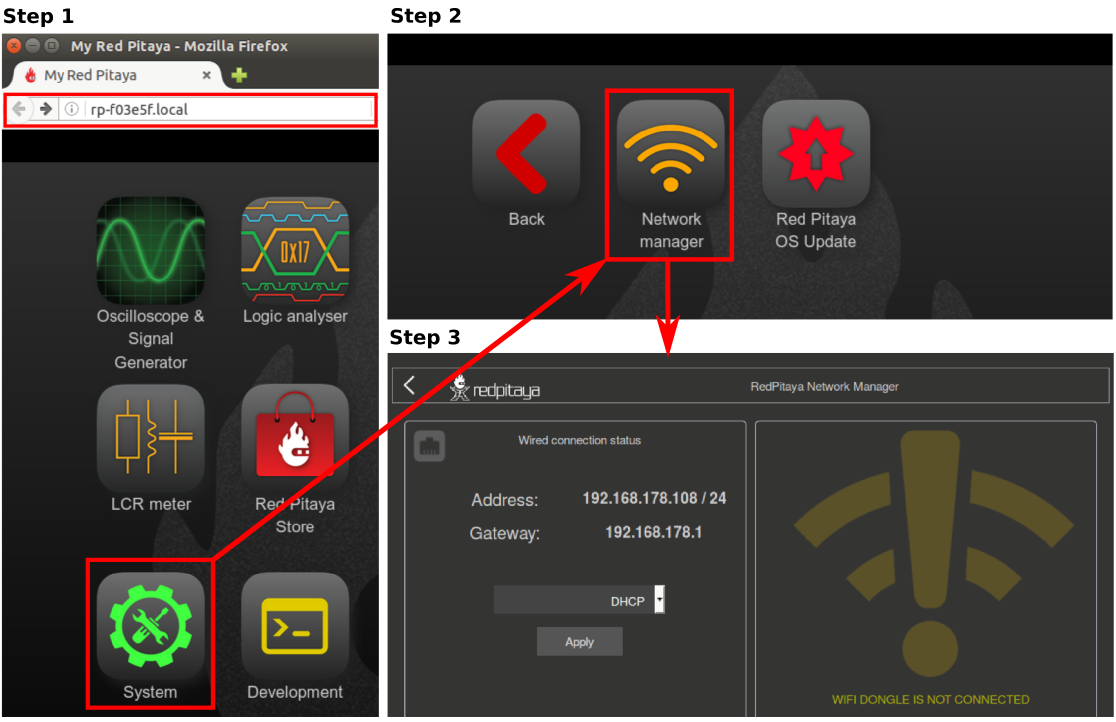
When the USB WiFi dongle is plugged in, the system will recognise it and enable additional settings.
Select Client Mode, the desired WiFi network, enter your password and press the Connect button.
When your Red Pitaya board is connected, the IP address will be shown in the user interface. This IP address is only for the WiFi connection. You can check the connection by inputting a WiFi IP address in the web browser URL field (press enter after inputting).
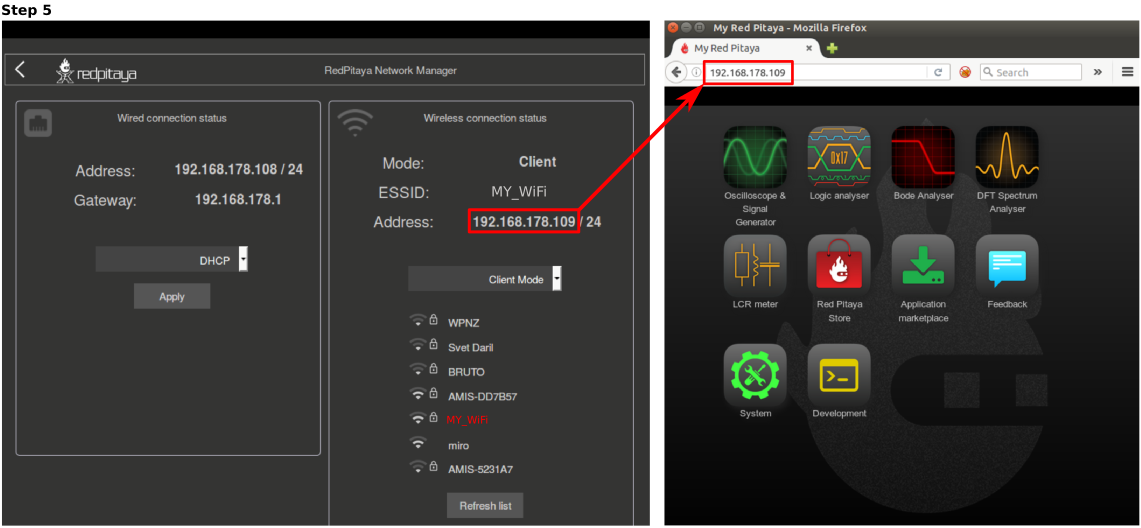
Now you have a WiFi connection established. If you restart the Red Pitaya board, it will connect to the selected network automatically (if it is available). Also, you can disconnect the LAN connection, and your board will still be available over the WiFi network, i.e., over the WiFi IP address.
Note
WiFi networks are generally not robust, and the full performance of the Red Pitaya application can be affected.
Note
When using the Raspberry Pi WiFi dongle, an issue of the dongle not being detected can arise. To mitigate this, detach the power cable from the Red Pitaya and wait for about a minute before powering up the Red Pitaya again.
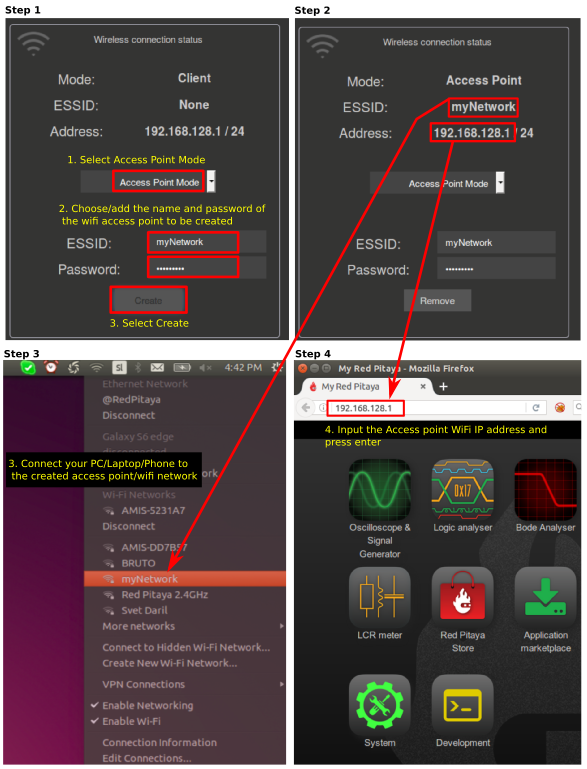
1.2.1.2.2. Access Point Mode (Currently not supported)
Red Pitaya can act as an access point when there are no LAN or WiFi networks available. This will allow you to connect your PC, laptop, tablet, or smartphone directly to the Red Pitaya over Wi-fi.
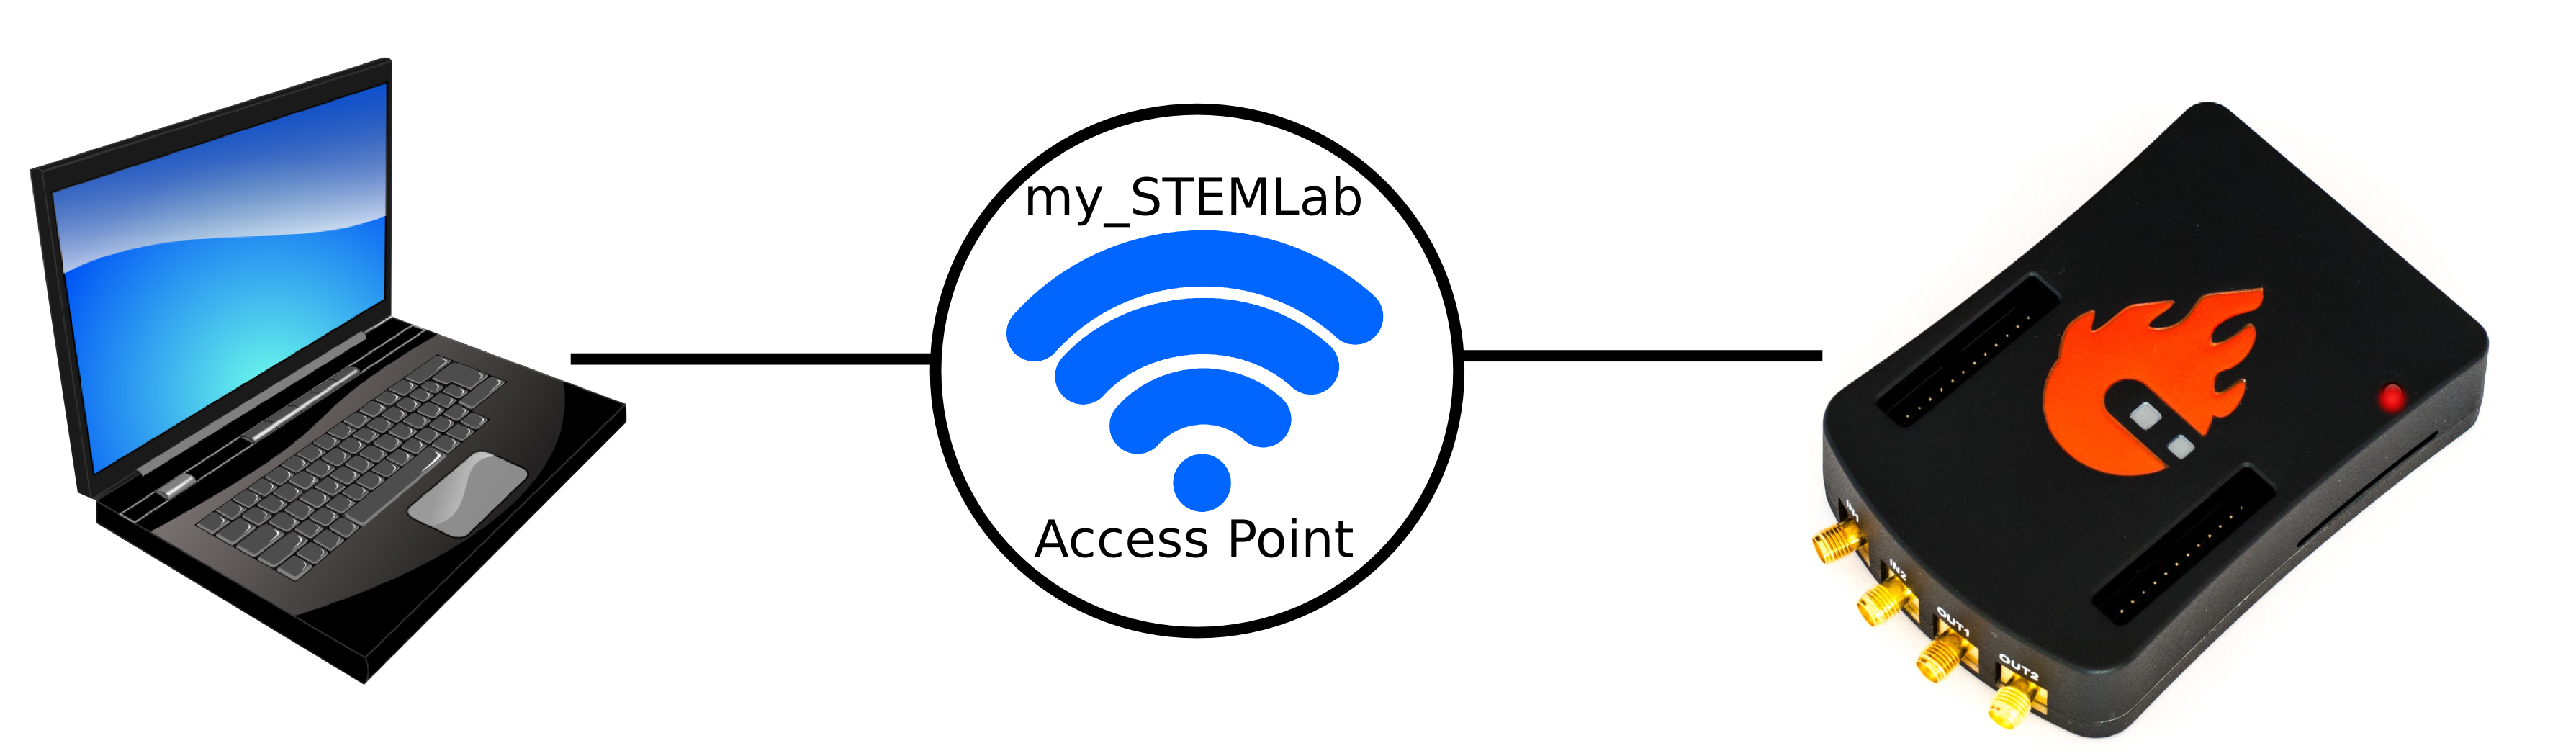
Follow the steps below to enable the access point and connect to it.
Start your Red Pitaya web user interface (Use the connection described in LAN connection)
Open the Network Manager application
Input the name and password of the access point network to be created. The password name should be at least eight characters long. Do not use special signs.
Connect your PC, laptop, tablet, or phone to the network created by the Red Pitaya board.
Input the Access Point network IP address into the web browser URL field and press enter.
Note
When Access Point is enabled on Red Pitaya, it will continue to boot in Access Point configuration until it is disabled in the Network Manager.
Note
The IP address in Access Point mode is always the same: 192.168.128.1