1.3. Prepare SD card
1.3.1. OS Versions
The OS versions are listed from newest to oldest. For development OS (Nightly Builds), please check the Nightly Builds chapter located at the end of the OS section.
1.3.1.1. 2.00 OS
With the 2.00 OS versions we moved to a unified OS image for all boards (One OS to rule them all).
RedPitaya OS 2.0:
Latest Beta (2.00-35) - CHANGELOG (MD5 (zipped): d3d59bca29421987550289fce29b87b5)
Latest Stable (2.00-30) - CHANGELOG (MD5 (zipped): ec890319d64ffe059cd0d747cf36eab7)
New C libraries were added with the Unified (2.00) OS ecosystem, which causes the C program compilation to fail on older OS.
Please make sure that your Red Pitaya OS and the downloaded Red Pitaya GitHub ecosystem repository are compatible. We recommend using a Red Pitaya GitHub ecosystem that is meant to run on your current Red Pitaya OS version:
2.00-35 - Branch 2024.2
2.00-30 - Branch 2024.1
2.00-23 - Branch 2023.3
2.00-18 - Branch 2023.2
2.00-15 - Branch 2023.1
1.04-28 - Branch 2022.2
1.04-18 - Branch 2022.1
Using an old OS with a newer GitHub ecosystem can result in compatibility isses.
Note
When updating the OS to 2.00 version from 1.04 or older (or downgrading from 2.00 to 1.04 or older), a factory reset of calibration parameters must be performed. Please open the Red Pitaya’s web interface and head to System => Calibration => Manual DC calibration. Click on Reset, select Factory, and confirm the reset. For more details on calibration, please see the Calibration application.
Note
If you have problems running the 2.00 version of the OS and you updated from the 1.04 or older OS image, please check this GitHub solution. For all other problems please contact the support team.
1.3.1.2. 1.04 OS
The 1.04 OS versions are board specific. Please download only versions compatible with your board type.
STEMlab 125-14 & STEMlab 125-10:
STEMlab 125-14 (SECONDARY/SLAVE board):
STEMlab 125-14-Z7020:
STEMlab 125-14 4-Input:
SDRlab 122-16:
SIGNALlab 250-12:
Note
To run the C applications with 1.04 or older OS, please use the 2022.2 or older release/branch of the GitHub ecosystem
1.3.1.3. Older OS versions
All older OS versions that are in our database are available in our archive:
For manual ecosystem upgrades please refer to Manual upgrade.
1.3.1.4. Nightly Builds
The nightly builds are snapshots of the development activity for upcoming Red Pitaya OS releases and include the newest features and bug fixes scheduled for the official releases. These builds are made available to make it easier for users to test their setup for potential issues with an upcoming release or to test new features and provide feedback on improving them before they are released as a Beta OS or Stable version.
We have decided to release the nightly builds to ensure that our codebase stays healthy and to shorten the time to fix some of the reported issues or implement some new features reported as suggestions for improvement.
As these builds are snapshots of the latest code, odds are you will encounter more issues compared to stable releases. Please report any issues to support@redpitaya.com so that our developers can review them and make any needed fixes.
Nightly Builds ecosystem:
Ecosystem builds run every Saturday night.
Note
These OS versions may be unstable and may cause misconfigurations or measurement data loss. We recommend that you use them solely for testing purposes, or you have reported a bug or requested a feature and our technical staff has instructed you to proceed.
Note
When updating from an OS version older than 2.00 to a Nightly Build version, a factory reset of calibration parameters must be performed. Please open the Red Pitaya’s web interface and head to System => Calibration => Manual DC calibration. Click on Reset, select Factory, and confirm the reset. For more details on calibration, please see the Calibration application.
1.3.2. Download and install the SD card image
The next procedure will create a clean SD card image.
Select an appropriate OS version from above and download it.
Unzip the SD card image.
Write the image onto an SD card. Instructions are available for various operating systems:
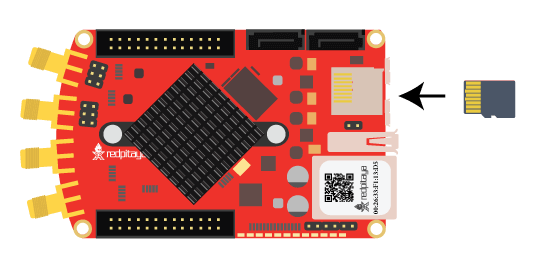
Insert the SD card into the Red Pitaya.
Note
This video shows how to identify your Red Pitaya model and write a memory card.
1.3.2.1. Windows
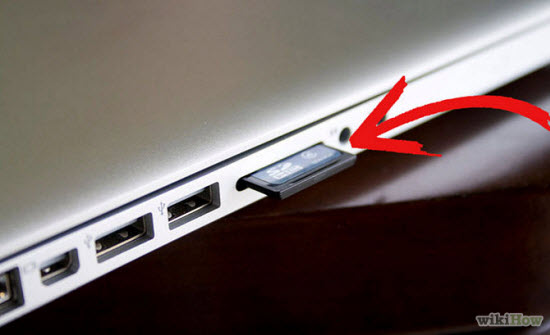
Insert the SD card into your PC or SD card reader.
Download Balena Ethcer and install it.
Open the newly installed Balena Etcher application.

Under Flash from file select an unzipped Red Pitaya image file.
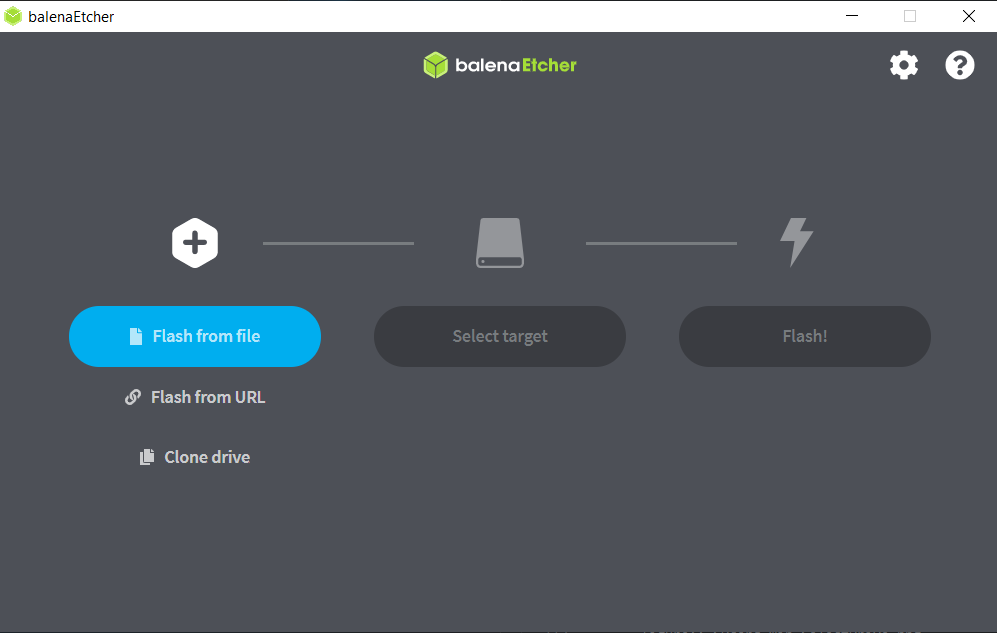
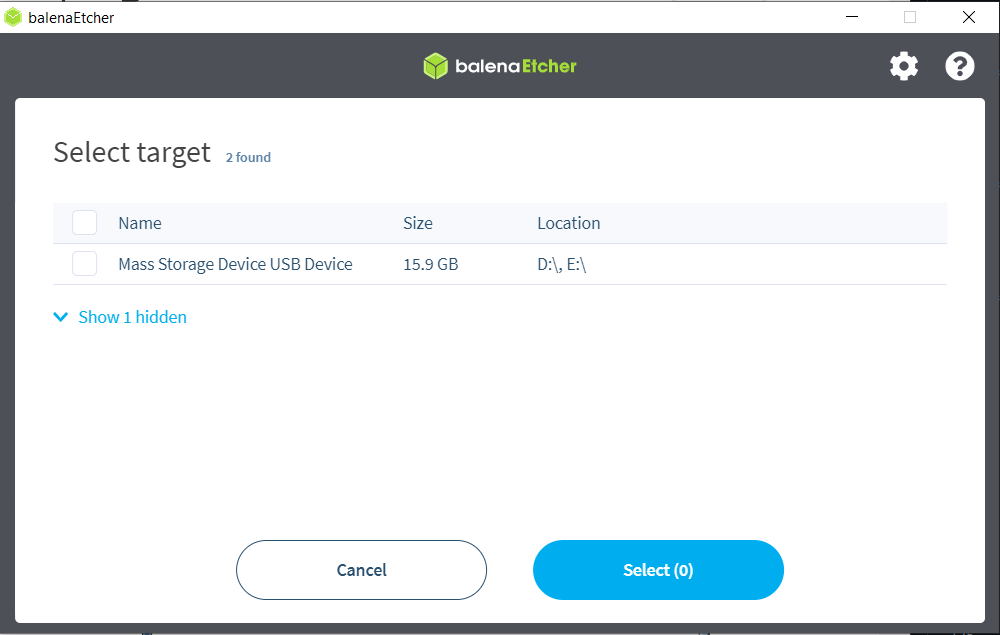
Under Select target choose the drive letter of the SD card. Balena Etcher will only show you external drives.

Note
Balena Etcher will only show you external drives, but please be careful to select the correct drive if you have multiple cards or USBs plugged into your computer. If you choose the wrong one, you risk erasing data from the selected drive. You can easily see the drive letter (for example, E:) by looking in the left column of Windows Explorer.
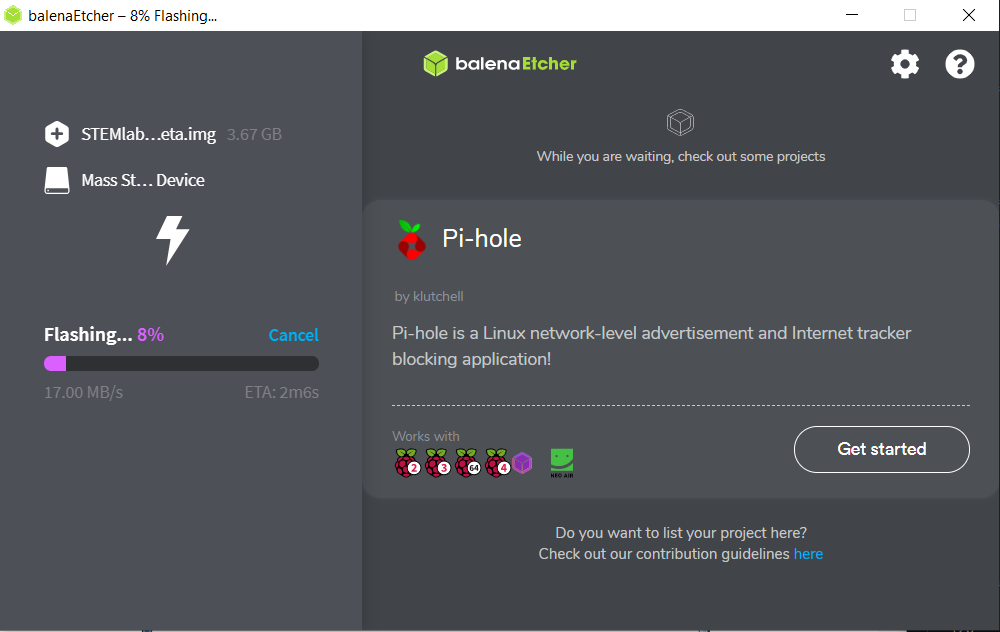
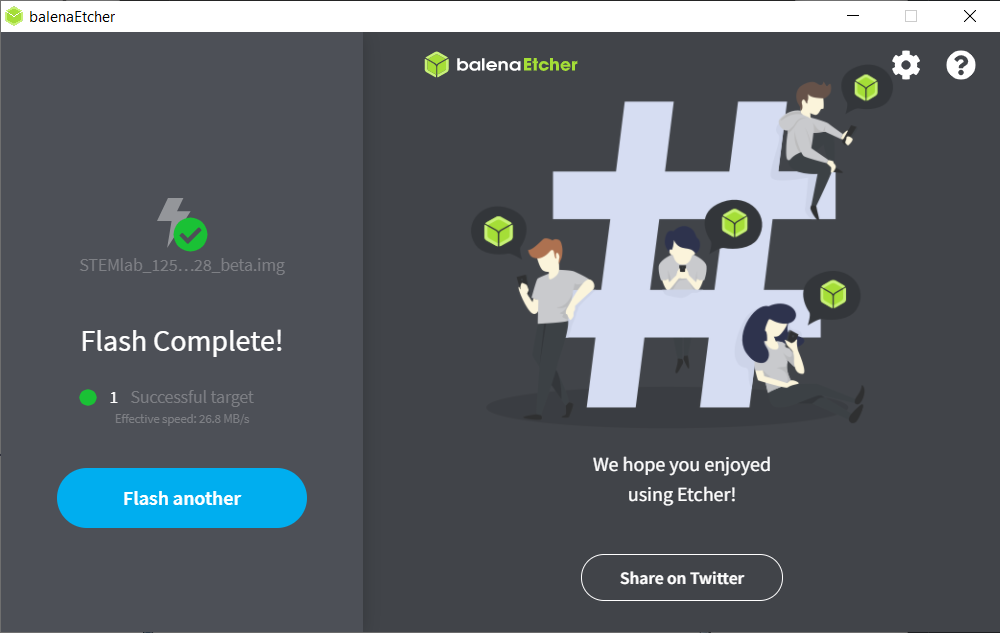
When you click Flash the computer will prompt you to allow the operation. Click yes and wait for the flashing and validation to be completed.
Close Balena Etcher.
1.3.2.2. Linux
Note
You can also use Balena Ethcer on Linux and macOS. Instructions are under Windows section.
1.3.2.2.1. Ubuntu using Image Writer
Right-click on the extracted SD card image and select Open With > Disk Image Writer.
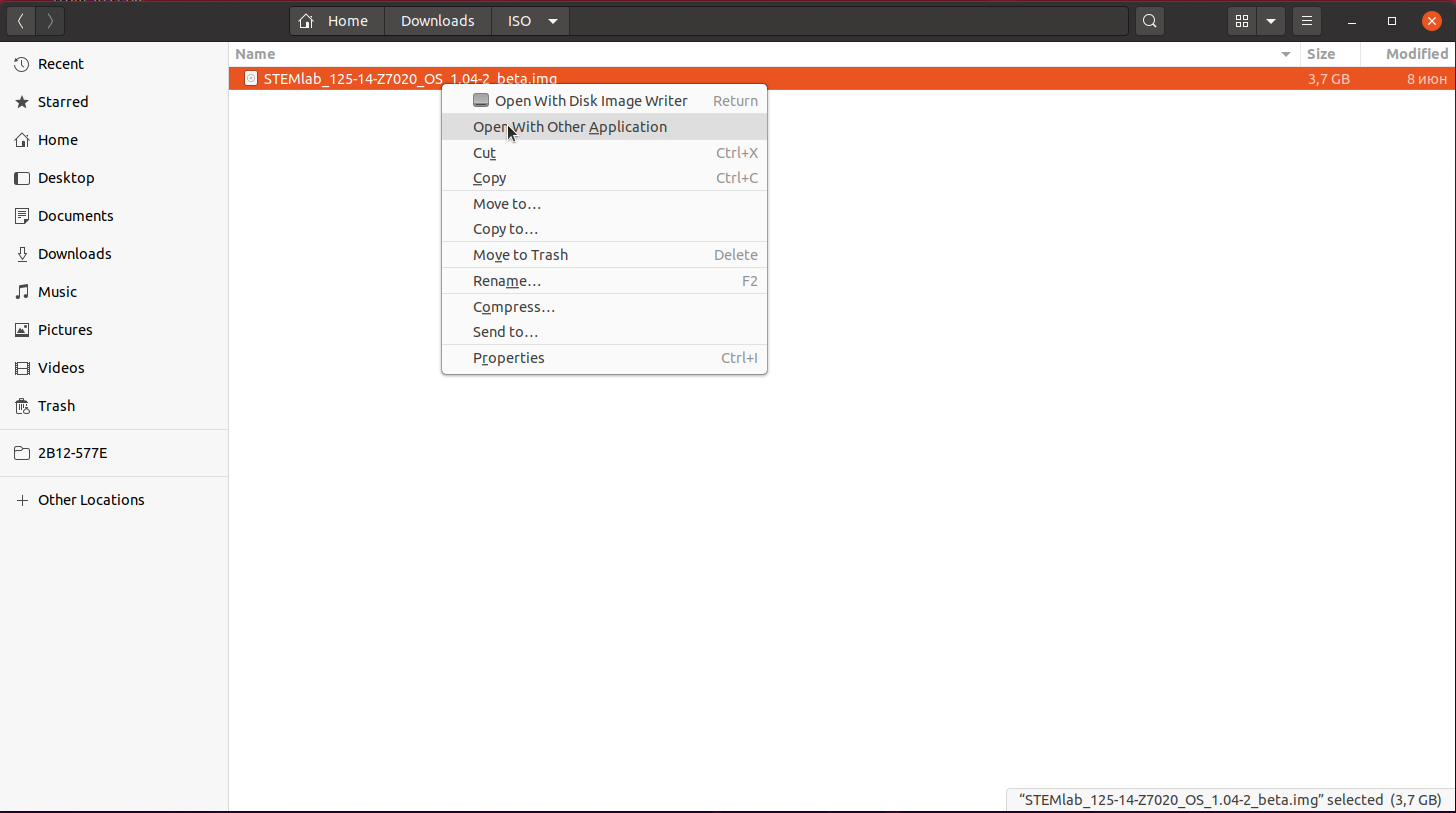
Context menu
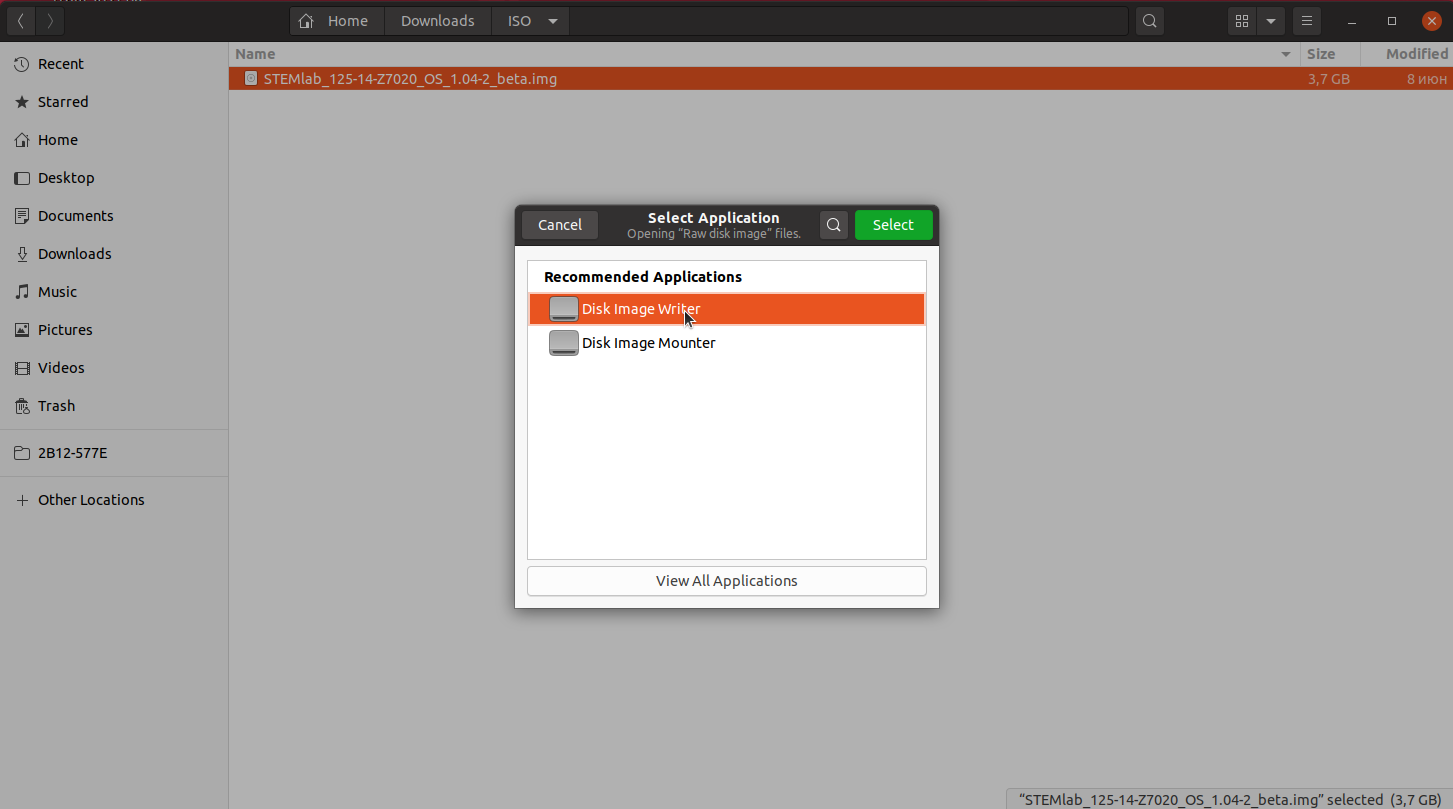
Select tool dialog
In the Restore Disk Image window, select your SD card in the Destination pull-down menu. Be careful to select the correct device; use the size for orientation (for example, a 16 GB SD card).
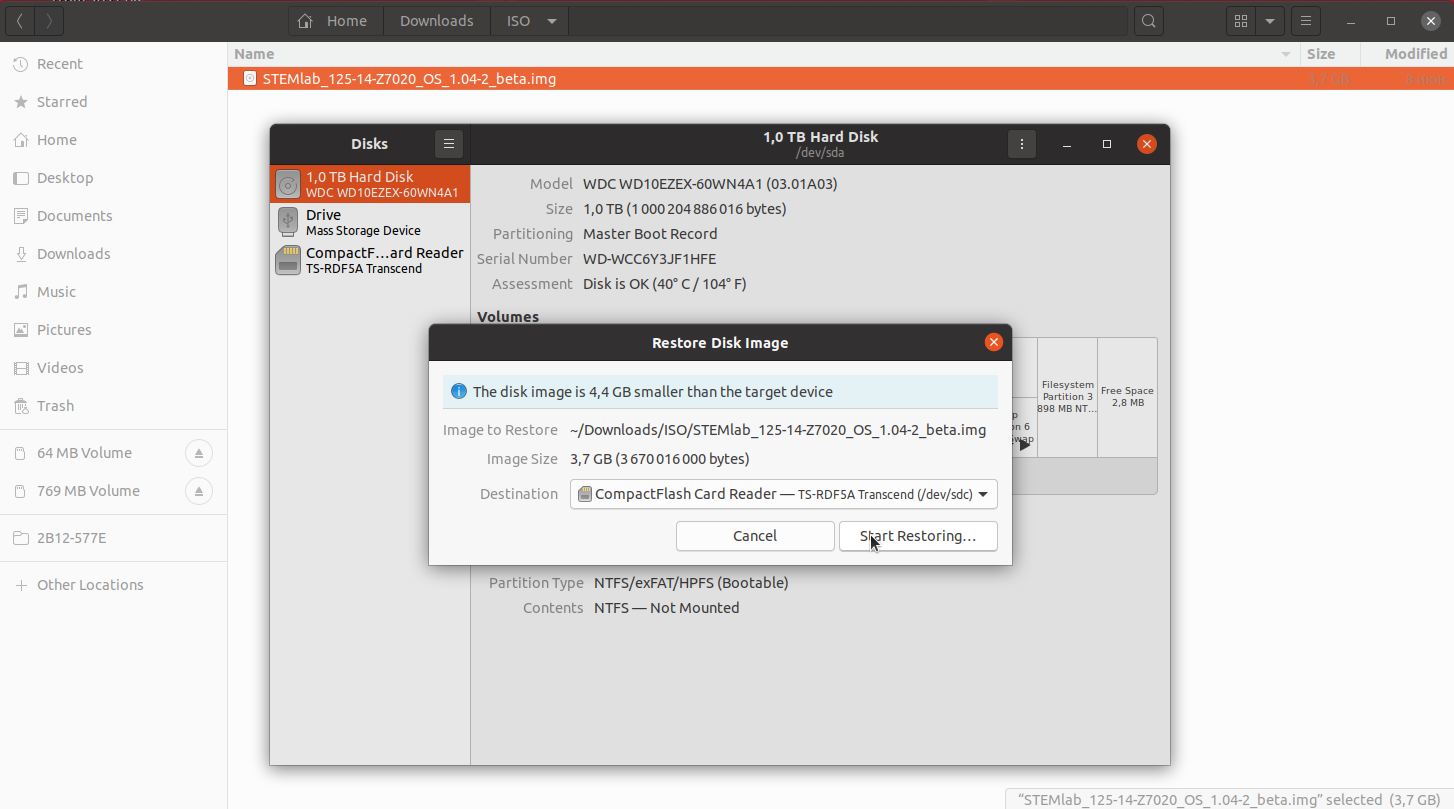
Select drive dialog
You will be asked to confirm your choice and enter a password. Additional dialog windows will again show the selected destination drive. Take the opportunity to reconsider whether you chose the right device.
1.3.2.2.2. Command line
Note
Please note that the use of the dd tool can overwrite any partition of your machine.
If you specify the wrong device in the instructions below, you could delete your primary Linux partition.
Please be careful.
Insert the SD card into your PC or SD card reader.
Open the terminal and check the available disks with
df -h. Our SD card is 16 GB. It is named/dev/sdxand divided into two partitions,/dev/sdx1and/dev/sdx2. The drive mounted at/is your main drive. Be careful not to use it.$ df -h Filesystem Size Used Avail Use% Mounted on /dev/sdx1 118M 27M 92M 23% /media/somebody/CAD5-1E3D /dev/sdx2 15.9G 1013M 15.8G 33% /media/somebody/7b2d3ba8-95ed-4bf4-bd67-eb52fe65df55
Unmount all SD card partitions with
umount /dev/sdxN(make sure you replace N with the right numbers).$ sudo umount /dev/sdx1 /dev/sdx2
Write the image onto the SD card with the following command. Replace the
red_pitaya_image_file.imgwith the name of the unzipped Red Pitaya SD Card Image and replace/dev/device_namewith the path to the SD card.$ sudo dd bs=1M if=red_pitaya_image_file.img of=/dev/device_name
Wait until the process has finished.
1.3.2.3. macOS
Note
You can also use Balena Ethcer on Linux and macOS. Instructions are under Windows section.
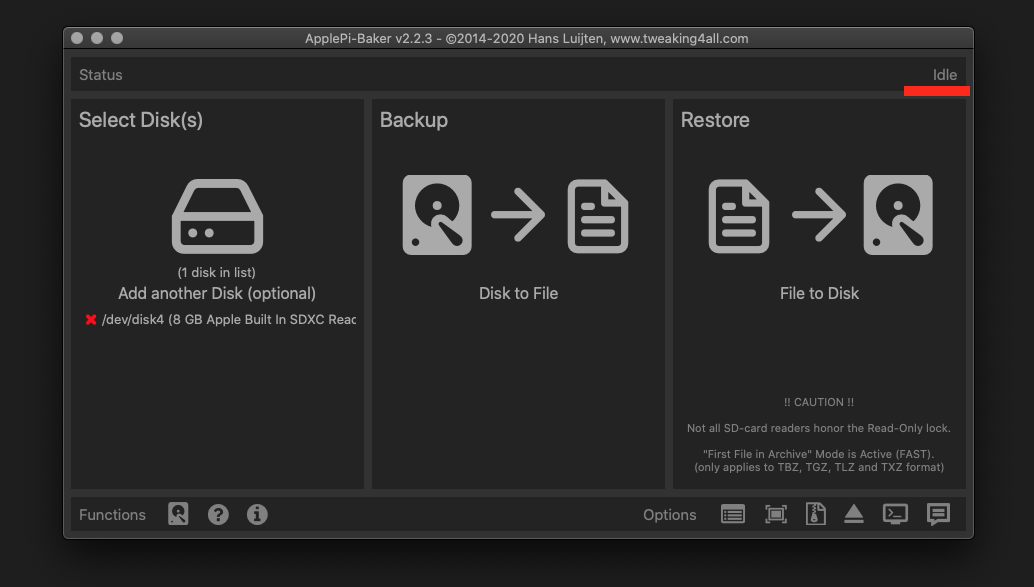
1.3.2.3.1. Using ApplePi-Baker
Insert the SD card into your PC or SD card reader.
Download ApplePi-Baker. Direct link:
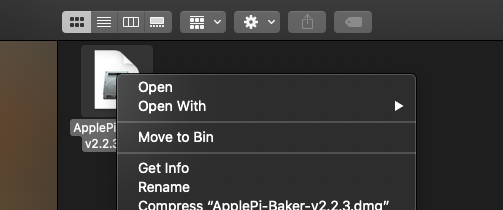
Click on ApplePi-Baker icon, then click Open in order to run it.
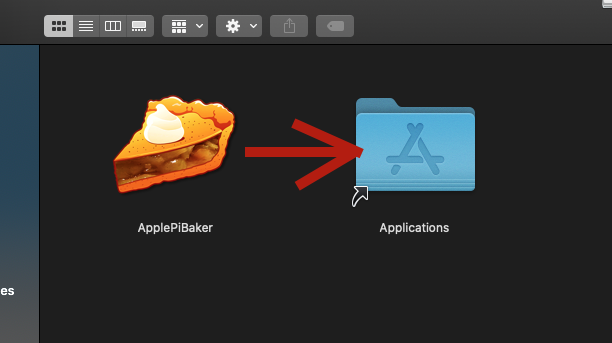
Drag and drop ApplePi-Baker for installation.
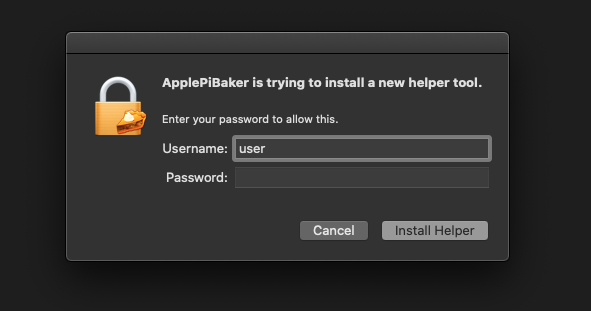
Enter your admin password and click OK.
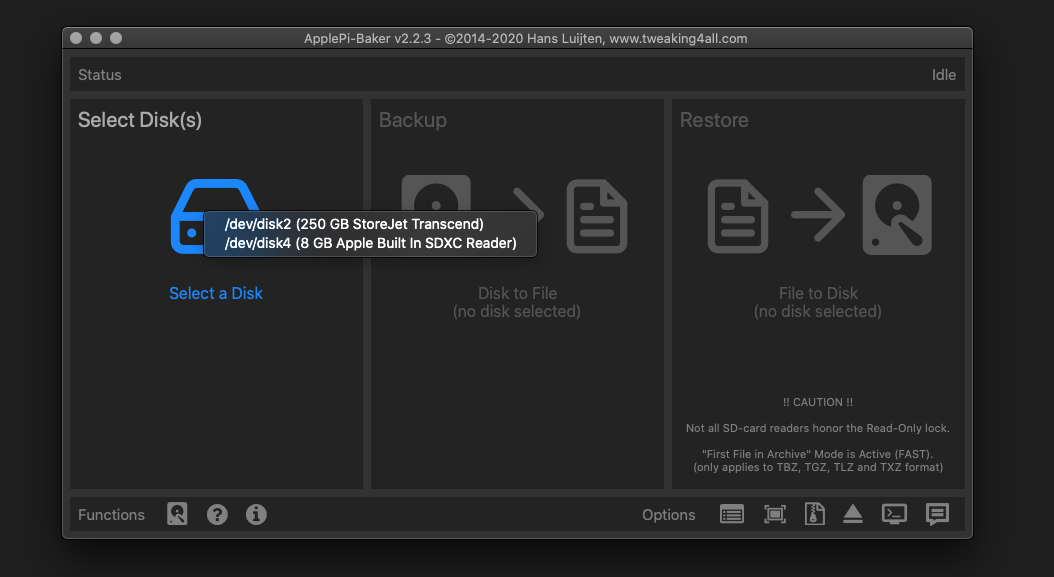
Select the SD card drive. This can be recognised by the size of the card, which is 16 GB.
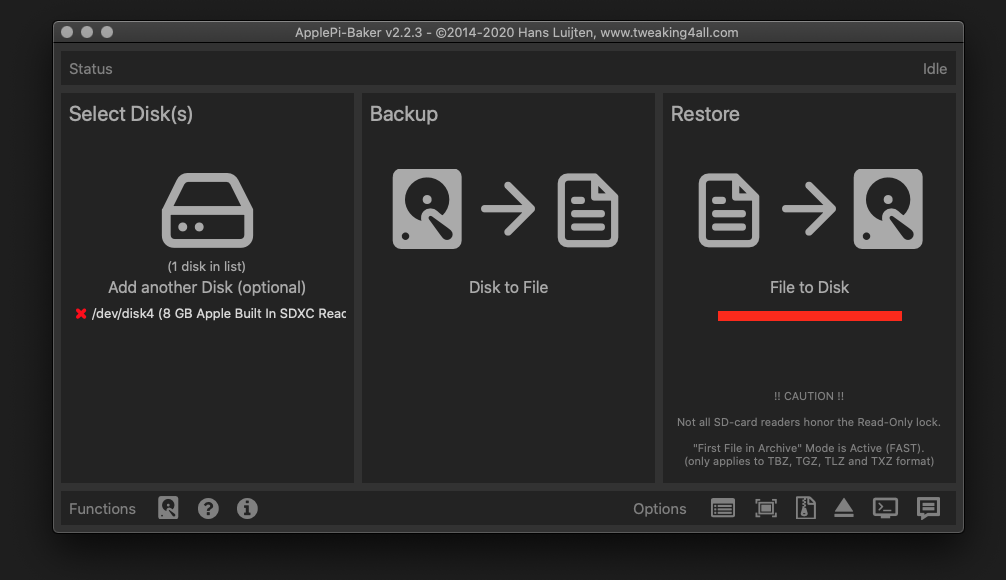
Select the Red Pitaya OS image file.
It’s coffee time. The application will show you the estimated time for accomplishment.
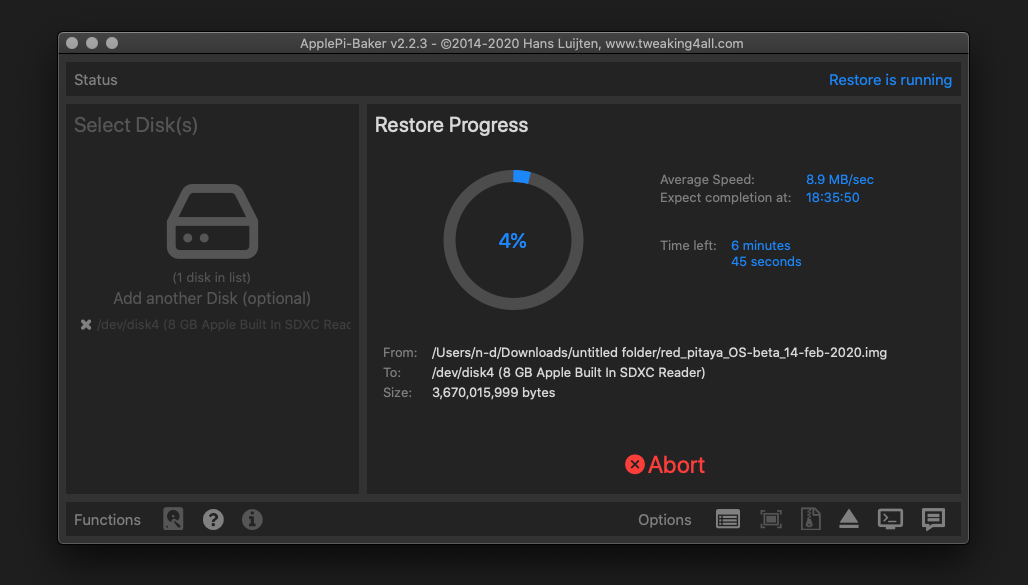
When the operation is finished, the status will change to idle.
1.3.2.3.2. Command line
Insert the SD card into your PC or SD card reader.
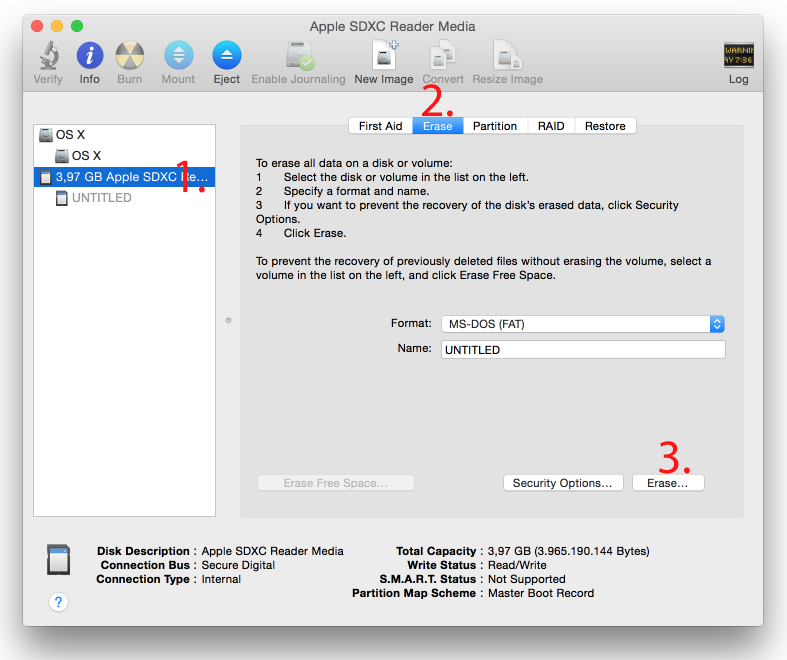
Click cmd + space, type Disk Utility into the search box and press enter. From the menu, select your SD card and click on the Erase button (be careful not to delete your disk!).
Click cmd + space, then enter
cdinto the Terminal. Then typecd Desktopand press enter once more.Unmount the partition so that you will be able to overwrite the disk. Type
diskutil listinto the Terminal and press enter. This will show you the list of all memory devices.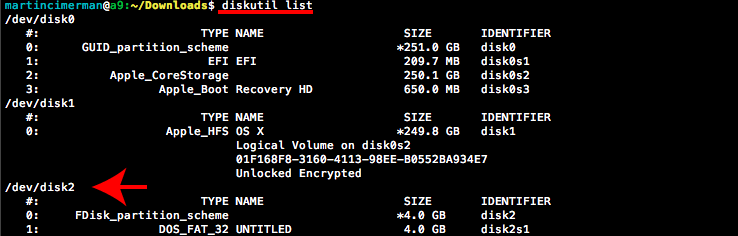
Unmount with:
diskutil UnmountDisk /dev/diskn(insert the numbernof your disk correctly!)
Type:
sudo dd bs=1m if=path_of_your_image.img of=/dev/rdiskn(Remember to replacenwith the number that you noted before!) (notice that there is a letterrin front of the disk name, use that as well!)
Type in your password and wait a few minutes for the image to be written.
When the image is written, type:
diskutil eject /dev/disknand press enter.Safely eject the SD card.
1.3.3. Background
A Red Pitaya SD card contains two partitions:
128 MB FAT contains the ecosystem:
boot files: FSBL, FPGA images, U-Boot, Linux kernel
Red Pitaya API libraries and header files
Red Pitaya web applications, scripts, tools
customized Nginx web server
~4 GB Ext4 contains the OS:
Ubuntu/Debian OS
various libraries
network setup customization
systemd services customization
Most of Red Pitaya’s source code translates into the ecosystem. Therefore, it is updated more often. The OS is changed less frequently.
Note
You can find older and developed Red Pitaya OS images and Ecosystem zip files on our download server.
Note
A list of new features, bug fixes, and known bugs for each Red Pitaya release can be found in our CHANGELOG.
1.3.4. Manual upgrade
Instead of writing the whole SD card image, it is possible to upgrade only the ecosystem.
A manual upgrade allows you to fix a corrupted SD card image (if only the FAT partition is corrupted) or to install older, newer, or custom ecosystem zip files.
Download a zip file from our download server.
Insert the SD card into the card reader.
Delete all files from the FAT partition. Use
Shift + Deleteto avoid placing files into the trash bin on the same partition.Extract the ecosystem zip file contents onto the now empty partition.
If you wish to keep wireless settings, skip deleting the next files:
wpa_supplicant.confhostapd.conf
1.3.5. Resize file system
When recording an image to a flash card of any size, we get sections of the file system of 4 GB in size. In order to increase the available free space, you need to execute the following script:
root@rp-f03dee:~# /opt/redpitaya/sbin/resize.sh
After the script is completed, the system will ask you to restart your Red Pitaya. If everything is done correctly, the system will start with an increased space size. This can be checked with the following command:
root@rp-f03dee:~# df -h
Note
If the file system size has not changed, try to manually run the command:
root@rp-f03dee:~# sudo resize2fs /dev/mmcblk0p2