3.2.1.1. Establish remote SSH connection
Access information for SSH connection:
Username:
rootPassword:
root
If you are unable to connect, check that Red Pitaya is connected to your local network.
Connection instructions are available for:
3.2.1.1.1. Windows 10
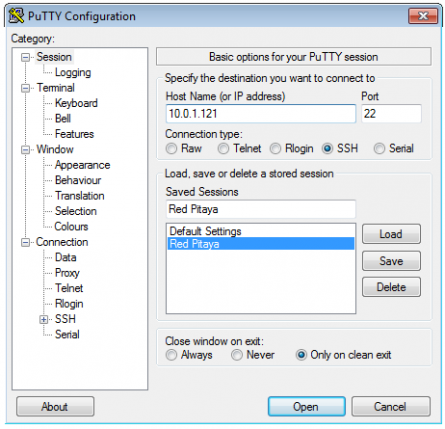
For this example, the|PuTTy tool| was used on Windows XP and Windows 7 Starter OS. Run PuTTy and enter the Red Pitaya’s IP address into the Host Name (or IP address) field.

PuTTy SSH connection settings.
If you attempt to connect to Red Pitaya for the first time, a security alert will pop up asking you to confirm the connection. At this time, the ssh-key will be added to the registry on your computer. A command prompt pops up after login is successful.
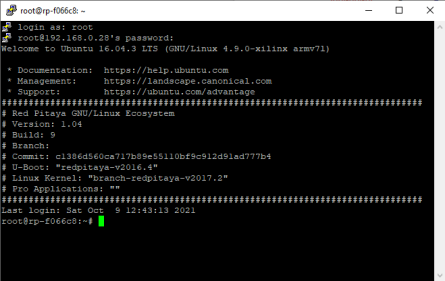
When connected to RP via SSH (PuTTy), you get the following command prompt screen:

SSH connection via PuTTy
The last command prompt/terminal line should read as “root@rp-xxxxxx:~#“ (the default home directory on Red Pitaya is /root).
Note
After updating the OS or after some time has passed since the last SSH connection, you might get the following message when trying to establish an SSH connection.
@@@@@@@@@@@@@@@@@@@@@@@@@@@@@@@@@@@@@@@@@@@@@@@@@@@@@@@@@@@
@    WARNING: REMOTE HOST IDENTIFICATION HAS CHANGED!     @
@@@@@@@@@@@@@@@@@@@@@@@@@@@@@@@@@@@@@@@@@@@@@@@@@@@@@@@@@@@
IT IS POSSIBLE THAT SOMEONE IS DOING SOMETHING NASTY!
Someone could be eavesdropping on you right now (man-in-the-middle attack)!
It is also possible that the RSA host key has just been changed.
The fingerprint for the RSA key sent by the remote host is
06:ea:f1:f8:db:75:5c:0c:af:15:d7:99:2d:ef:08:2a.
Please contact your system administrator.
Add correct host key in /home/user/.ssh/known_hosts to get rid of this message.
Offending key in /home/user/.ssh/known_hosts:4
RSA host key for domain.com has changed and you have requested strict checking.
Host key verification failed.
Do not worry, nothing is wrong with your Red Pitaya. The problem is that the Red Pitaya identification key has changed. To fix this use the following code:
ssh-keygen -R rp-xxxxxx.local
And try to establish the SSH connection again.
Alternatively, open Explorer and go to C:/Users/<your-username>/.ssh and open the known_hosts file. Delete all lines containing rp-xxxxxx.local.
3.2.1.1.2. Linux
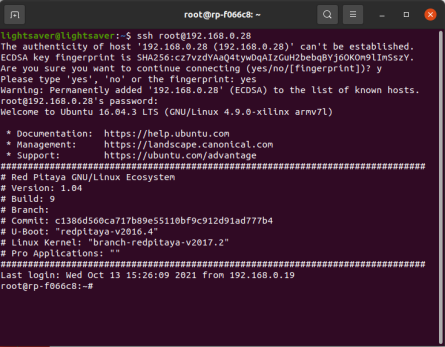
Start Terminal and type (replace the IP address with the right one):
user@ubuntu:~$ ssh root@192.168.1.100
root@192.168.1.100's password: root
Red Pitaya GNU/Linux/Ecosystem version 0.90-299
redpitaya>

3.2.1.1.3. macOS
Run terminal Launchpad → Other → Terminal and type (replace the IP address with the right one):
localhost:~ user$ ssh root@192.168.1.100
root@10.0.3.249's password: root
Red Pitaya GNU/Linux/Ecosystem version 0.90-299
redpitaya>